


Categories
Digitizing Animals with Hatch - Two Creative Ways to Bring Pets to Life
![]()
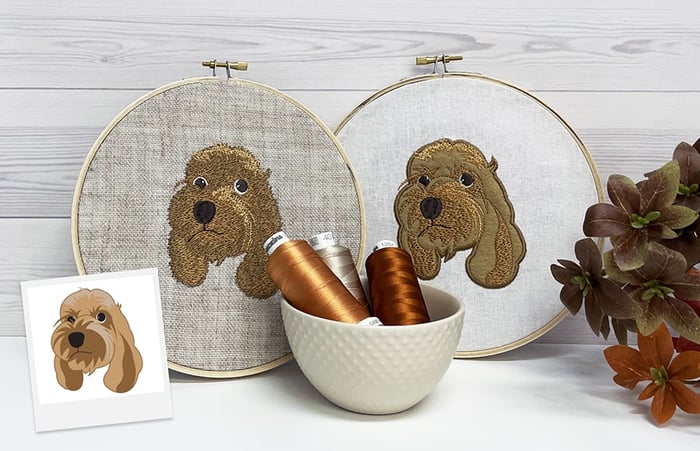
Table of Contents
Digitizing animals in Hatch Embroidery Digitizer is one of the most rewarding ways to personalise your embroidery projects. Whether you’re recreating your own pet or working from a client’s photo, Hatch gives you a range of tools to turn images into stitches that feel alive.
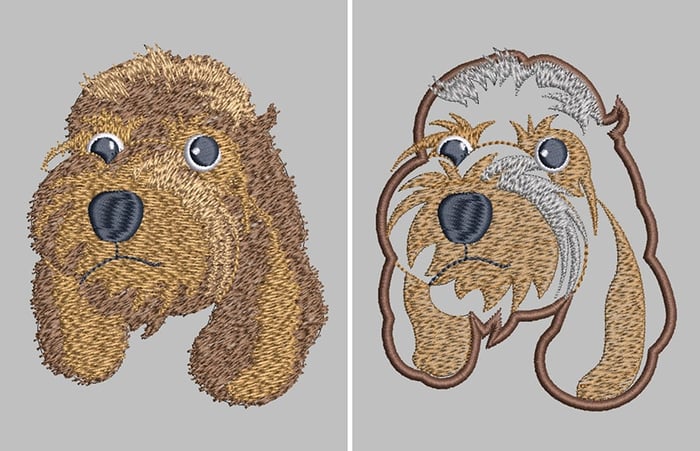
In this article, we’ll focus on two highly versatile and popular styles for animal embroidery:
1. Appliqué Dog: for bold shapes, fabric textures, and reduced stitch counts.
2. Furry Dog: for realistic texture and shading that mimics the softness of fur.
We’ll use the same dog artwork for both designs to show how your digitizing choices can completely change the look and feel of a piece.
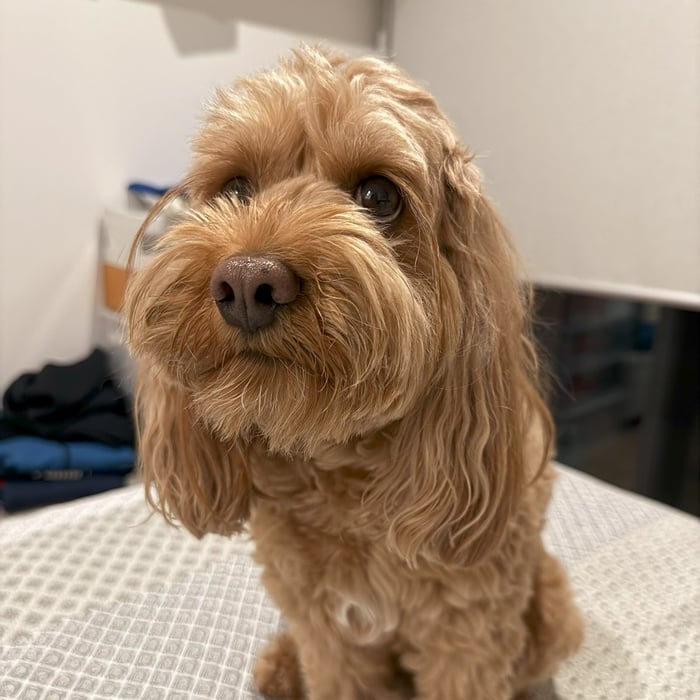
The embroidery designs were based on this adorable pup, Cosmo.
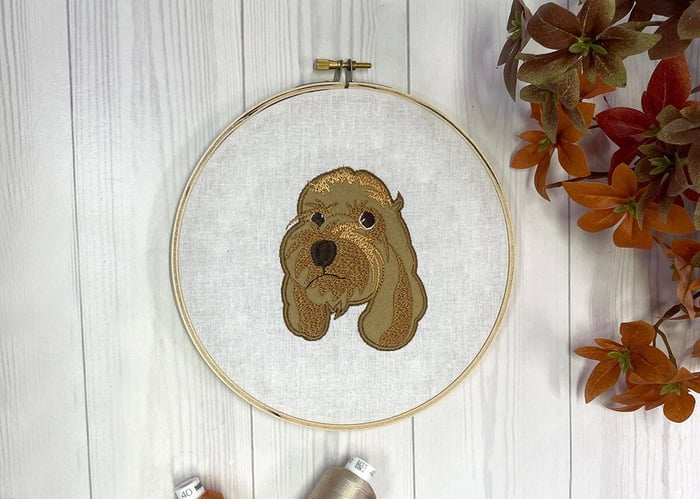
Appliqué Dog – Adding Fabric for Texture and Colour
The appliqué version of our dog uses a simplified image to keep the design clean and fabric-friendly. This approach lets you introduce fabric textures and patterns, reduce stitch density, and make the design pop without excessive embroidery time.
Why Choose Appliqué for Animals?
Appliqué works wonderfully for animals with large areas of solid colour. It allows you to bring in fabric patterns and textures that add charm, save thread, and cut down on stitching time, perfect for quilts, clothing, and decorative items.
Steps to Create the Appliqué Dog in Hatch:
1. Set Up Your Artwork
Start by importing your simplified dog image into Hatch. Position it on your workspace, ready for outlining.
2. Digitize Appliqué
- Select the Digitize Appliqué tool.
- Carefully outline the dog’s main shape.
- Under Properties, choose:
- Style: Precut
- Cover: Satin
- Width: 2.5 mm
3. Add Details
- Use Open and Closed shapes to digitize features like the eyes, ears, and facial markings.
- For fabric areas, apply Tatami pattern #61 with no underlay (since it will sit on top of the applique fabric).
- For backstitch and satin detail work, add underlays for durability and definition.
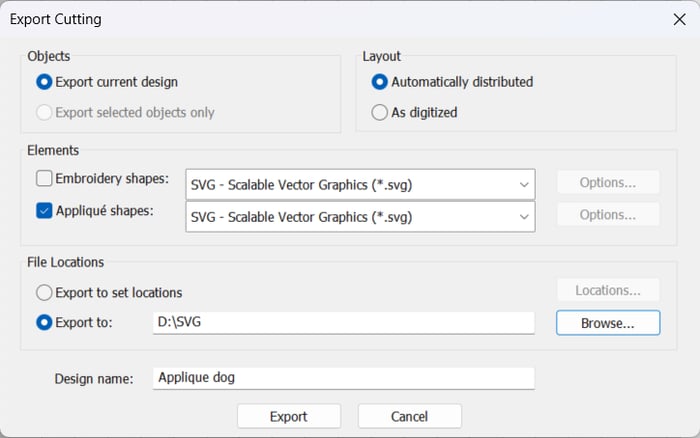
4. Prepare for Cutting
If you’re using a fabric cutting machine (e.g., Brother ScanNCut), export the cutting file:
File > Export Cutting > Appliquéx Shapes (SVG) > Export To (select your folder) > Export.
This generates an SVG file you can load into your cutter for perfectly shaped fabric pieces.
Pro Tip: Choosing a slightly contrasting fabric can make animal features stand out more and add visual interest to your design.
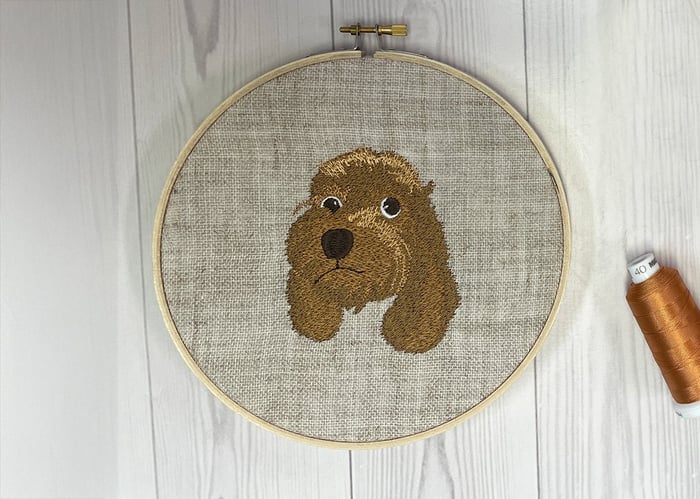
Furry Dog – Capturing Realism with Stitch Effects
The furry version of the dog is where Hatch’s texturing tools really shine. By layering colours and applying special stitch effects, you can create a design with depth, softness, and lifelike character.
Why Choose a Fur Texture Style?
If you want to capture the unique personality of a pet, from the subtle colour changes in their coat to the softness of their fur, this style is unbeatable. It’s ideal for cushion covers, framed embroidery art, or any project where detail is the star.
Steps to Create the Furry Dog in Hatch:
1. Digitize the Base Shape
Start by digitizing the dog’s full silhouette using Tatami fill #61. This will be your base layer.
2. Add Fur Texture
In Object Properties, check Hand Stitch Effect, then select Both Sides Feather Edge.
This softens the edges, creating a natural, fur-like outline.
3. Layer the Shading
- Build up colour in stages, starting with the darkest shade of the coat.
- Add progressively lighter layers to create depth and highlight areas.
- Think about the direction of fur growth—your stitch angles should follow it.
4. Add Details Last
The eyes, nose, and mouth should be digitized as the final objects so they sit cleanly above all fur layers. This keeps the expression crisp and lifelike.
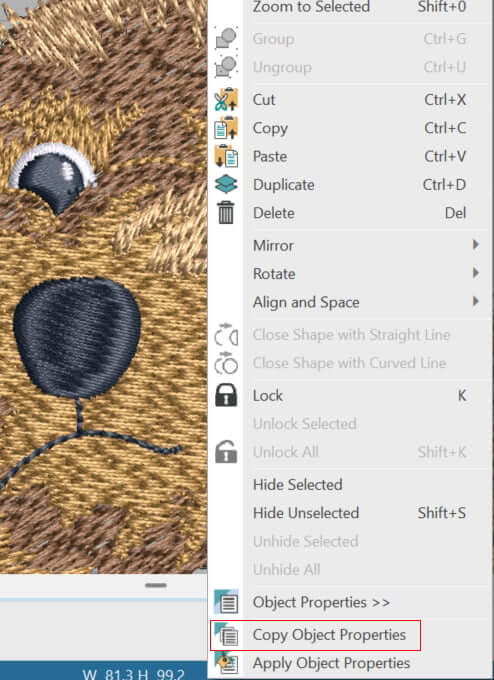
Pro Tip: Save time by reusing stitch settings - right-click an object you’ve set up, select Copy Object Properties, then apply them to new objects. This ensures consistency in your fur texture without having to reconfigure settings each time.
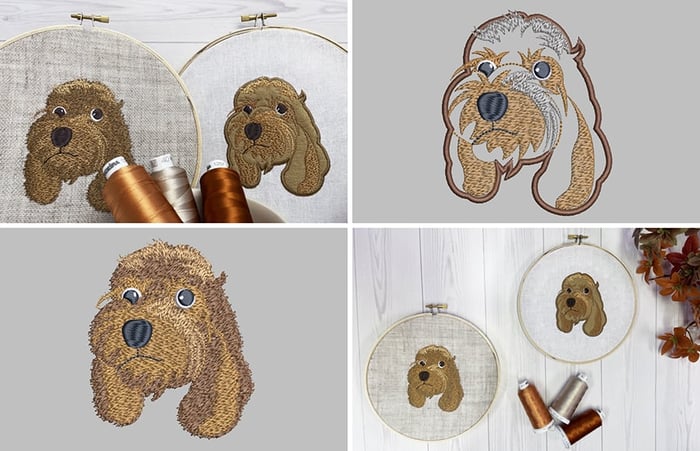
Comparing the Two Styles
Even though both versions start from the same dog artwork, the results are dramatically different:
- Appliqué Dog gives you bold shapes, playful fabric choices, and reduced stitch counts. It's great for garments and soft furnishings.
- Furry Dog offers rich, textured realism, making it ideal for display pieces or high-end custom embroidery.
Your choice will depend on the project’s purpose, fabric, and desired effect. In some cases, you may even combine the two, using applique for the main body and fur effects on selected areas.
Why Hatch Embroidery Digitizer Makes It Easy
Hatch’s built-in tools simplify what could otherwise be a complex process:
- Digitize Appliqué Tool: fast, accurate outlines for fabric placement.
- Tatami Patterns & Fill Options: control texture and stitch direction.
- Hand Stitch Effect & Feather Edge: for natural fur transitions.
- Export Cutting Files (SVG): for precise appliqué shapes using cutting machines.
- Copy/Apply Object Properties: to maintain a consistent look across multiple elements.
These tools mean you can focus on creativity instead of wrestling with settings.
Final Thoughts
Digitizing animals is more than just translating an image into stitches, it’s about choosing the right style to suit your project. With Hatch Embroidery Digitizer, you can easily take the same artwork and adapt it for different purposes.
The Appliqué Dog offers simplicity, speed, and fabric creativity, while the Furry Dog gives depth, realism, and a professional finish that’s hard to match.
Whichever style you choose, the process is a chance to experiment, learn, and produce something truly personal. Once you master these two techniques, you’ll be able to bring any pet design to life, whether it’s a playful applique for a quilt or a lifelike portrait for a framed keepsake.
Feeling Inspired? Try It Yourself!
Whether you're inspired by the seasons or dreaming up your own theme, Hatch Embroidery Digitizer gives you all the tools to turn your vision into a stitched work of art. From motif fills to personalized lettering and quilting tools, the possibilities are as endless as your creativity.
We’d love to see what you make. Share your embroidered quilts with us in our Facebook group. We’re always thrilled to celebrate the creativity of the Hatch community.
⭐⭐⭐⭐⭐
The definite choice when selecting embroidery software
Hatch Embroidery software is a comprehensive embroidery design solution that offers a range of tools and features for both beginners and seasoned embroiderers.
Here’s why it's a great choice:
- User-Friendly Interface: The software is designed with a user-friendly interface that makes it easy for anyone to start creating beautiful embroidery designs, regardless of their experience level.
- Powerful Editing Tools: It provides powerful editing tools that allow users to resize, edit, and adjust embroidery designs with precision. This is essential for businesses that need to customize designs according to specific customer requirements.
- Wide Range of Formats Supported: Hatch Embroidery supports a wide range of machine file formats, making it versatile for use with different embroidery machines. This flexibility is crucial for businesses operating with multiple machine types.
- Professional Quality: The software generates professional-quality stitches, ensuring that the end products are of high quality, which is vital for maintaining customer satisfaction and business reputation.
- Extensive Design Features: With features like auto-digitizing, lettering, monogramming, and even special effects, businesses can offer a wide range of embroidery services, increasing their market appeal and potential revenue streams.
- Regular Updates and Support: Hatch provides regular software updates and robust customer support, ensuring that businesses can always access the latest features and get help when needed.
Overall, Hatch Embroidery software equips you with the tools necessary to create stunning, high-quality embroidery designs efficiently and effectively, enhancing productivity and customer satisfaction.
Hatch Embroidery software products are in popular use in over 120 countries. It is time to join the global trend and give Hatch a try! The 30-Day Free Trial grants you unlimited use of all the amazing features and the 30-Day Money-Back Guarantee ensures that there is absolutely no risk involved. In fact, choosing Hatch Embroidery software is one of the smartest things you can do when selecting suppliers and supplies for your home embroidery business.
Enjoy over 80 FREE lessons presented by our own embroidery experts in Hatch Academy. Grow your confidence and embroidery skills fast to start creating your own beautiful designs in no time!
 |  |  |  |
| Hatch Academy over 80 FREE Lessons | 30-Day | Money-Back Guarantee ease of mind | Hatch FlexPay monthly instalments |
FAQs
Can I create both appliqué and fur-textured embroidery from the same photo?
Absolutely! You can start with the same pet image and produce two distinct embroidery styles in Hatch. Duplicate your project, then apply the Digitize Appliqué tool for the applique version and use Tatami fill plus Hand Stitch Effect for the furry, textured version.
Do I need a cutting machine to make the appliqué dog design?
Not necessarily. You can hand-cut the appliqué using printed templates. But using a cutting machine - after exporting an SVG file via File > Export Cutting > Appliqué Shapes - offers greater precision and faster results, especially for detailed shapes. This workflow is standard for machine appliqué, where a placement line, tackdown, trimming, and satin border are automated by the machine.
What materials and stabilizers work best with appliqué embroidery?
Choose appliqué fabrics that complement your background in weight and texture to reduce puckering and shifting. Use a tear-away stabilizer for lighter fabrics and cut-away stabilizer for stretchy or thicker materials. These precautions help your appliqué maintain stability and stitch quality.
How many colors or layers are recommended for realistic fur effects?
To build convincing fur texture, use a minimum of 3–5 shades within the same color family - starting with dark base layers and gradually adding lighter highlights. This layering creates depth, and applying the Hand Stitch Effect with Both Sides Feather Edge enhances the lifelike appearance of the fur.
Which style is faster to stitch: Appliqué or furry digitized designs?
Appliqué is typically quicker because fabric covers large areas instead of dense stitches. The furry style involves multiple layers, color changes, and detailed fills, making it more time-intensive. Appliqué is perfect for efficiency and bold visual contrast; the furry style excels in realistic, high-detail embroidery.
Related Articles
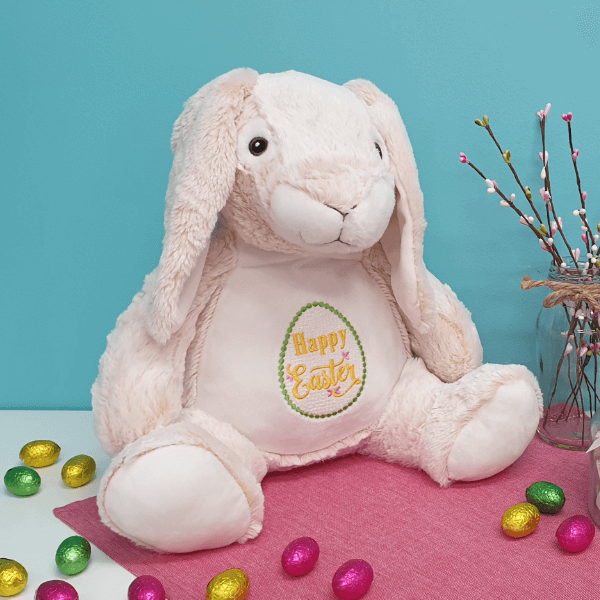
Machine Embroidery on Stuffed Animals
Machine embroidery on stuffed animals can add a personalized or customized dimension to the toy. Firstly,... more »
Digitizing Animals with Hatch Embroidery – FREE King Parrot design
Once you have mastered the basics of digitizing, you can easily find yourself looking for the next... more »
10 Paw-fect Embroidered Christmas Gifts For Your Furry Friends
Hatch Embroidery Software together with your embroidery machine, will let you produce unique and colorful... more »
Animal Themed Embroidery Inspirations
You have got to love animals. We admire them in the wild, and as pets they brighten our days with their... more »