Categories
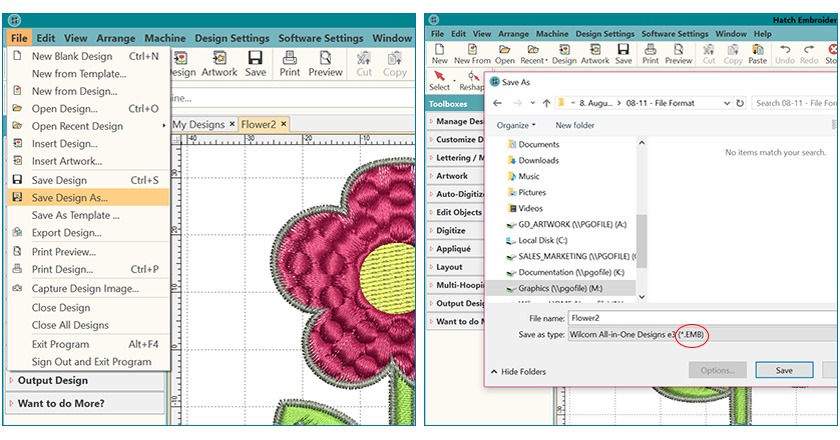
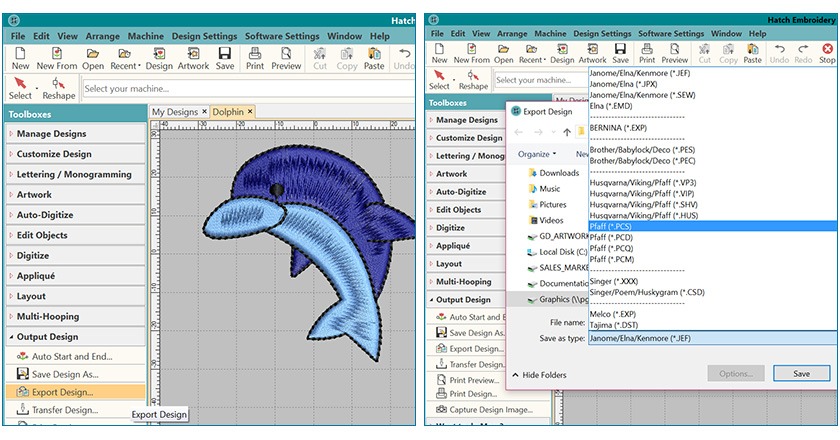
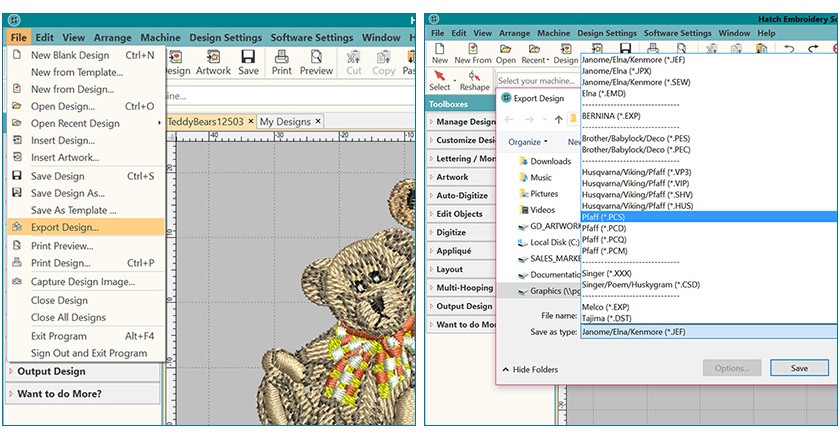
How to Export Your Designs to Your Machine Format
Hatch
Blog | How to
July 28th, 2016
8 minute read
And the importance of saving your design as an .EMB file

In this week’s blog, we’re teaching you how to export your designs to your machine format, and why it is so important to save your designs as .EMB files. We guide you step-by-step, showing you exactly where to click and what to do when it comes to saving and converting your files.
Since we released Hatch Embroidery, we’ve received many lovely reviews from our users! We are thrilled that so many people already use and love Hatch. Because of this, we’re constantly committed to looking for ways we can improve the software and the user experience even further. That’s why we love it when we receive any feedback or correspondence. Three questions we receive frequently are:
1. Why is it that when I try to save my designs using the ‘save as’ option there is no option for my machine format?
2. How do I save my designs to the proper format for my machine?
3. Why do I need to save as .EMB if my machine does not use this format?
When most customers are finished working with a design in Hatch, they will click “Save As” but they do not find their file format listed. This does not mean that the design cannot be saved in the specific machine format. Hatch Embroidery makes it easy to keep your working files (.EMB) separate from your machine format files.

Always save in the .EMB file format first!
No matter what file format you start working with, be sure to always save your finished file to .EMB format. This file contains all the information about your design: colors, stitch type, objects, software settings, and much, much more. Therefore it’s important to first ensure everything is in .EMB. We will discuss below more on why this EMB format is so beneficial, and then move onto saving designs in your machine format.
Saving your file as an .EMB format
1. Click the File Menu
2. Click “Save Design As…”
3. In the “Save as Type” menu select the .EMB format and click Save.

Why should I save my design as .EMB first?
If you need to go back and make edits to your file after you have stitched the design on your machine, ALWAYS open the .EMB file you initially saved NOT the stitch-based machine file! This means you have access to the design at the last place you saved it. It’s like you never stopped to stitch it! This type of file is called the “Pure .EMB File” and is the best choice as the quality supersedes the stitch-based file. While Hatch software will recognize stitches and objects in the stitch-based file, the quality is unmatched to an editable .EMB file.
A side-note…
Note the difference between the stitch-based file and the pure .EMB file. It is important to differentiate between the files as this differentiation is the key to finding out the quality of your file. This will ultimately affect any further work you choose to do on the design. Many companies will start with a stitch-based file and then open and save it as an .EMB file, so knowing the difference will help you in the long run. The best option is the pure .EMB file, or Grade A, if it’s available. It is also helpful to note the original creator of the file and the software used to create the file.
To tell the difference between a stitch-based file and a pure .EMB file, start with the design open. Click on the “Design Settings Menu” at the top, then click “Design Information”. At the bottom of the dialog box you’ll see the “EMB Grade”. Grade A is the best and your “pure .EMB” file and has all the original settings the digitizer used. Lower grades indicate that someone has converted the design from a stitch format to .EMB or it was opened from a stitch-based file. This will be shown by the lower grade and may state “estimates stitches or recognized stitches” depending on the quality of the file.
A little more information on the .EMB file
Going a step back, one of the first things to keep in mind is the difference between “source formats” and “machine formats”. Source formats are specific to the software used to create the design (for example the .EMB file). Machine formats are created to suit a specific type of machine. As mentioned earlier, it is recommended that your save your original file (your source format) as .EMB file, as this file format stores ‘true object-based properties’ so you can easily edit it. .EMB is the file format that is generally recommended you work with at the first instance, with many digitizers (professionals and hobbyists alike) using the .EMB format. This means that when you finish working on a design, you should save it in the .EMB format before subsequently exporting it to another embroidery format.
Apart from being the most popular format, why is .EMB file recommended? Simply because it is the ideal format for your day-to-day needs. It provides an all-in-one utility in several ways. Firstly, you can scale designs. This means when you re-size your pure .EMB design, you maintain all special effects, fills, and stitch-scale.
Difference between Wilcom and Hatch .EMB
As mentioned previously, there is a marked difference between the .EMB files that Wilcom users and Hatch users work with. While users of Wilcom software have enjoyed working with traditional .EMB, there have been some recent updates with the Hatch version. Hatch Embroidery version 1 sees .EMB file formats improved in multiple ways including updates and improvements to monogramming, lettering baselines, letting art, and auto-fabrics. There are also additional features that users can now utilize including 3D Satin, buttonhole bar stitch spacing, and the ability to change needle point color.

Saving your design in your preferred machine format
You will need to “Export” your design to a machine format. While the automatic reaction is to “Save As”, with Hatch Embroidery, converting to a machine stitch file requires the "Export" tool. The machine formats only save the minimum amount required for the machine and will not save all technical details in the work you’ve completed. Saving your file as an .EMB will save all the raw information and gives you the flexibility to edit the design in the future. There are two ways to export.
Method 1: Using the Toolbox
1. Click the Output Design Toolbox (left side of the screen)
2. Click “Export Design”
3. In the “Save as Type” menu select your machine format and click Save.

Method 2: Using the File Menu
1. Click the File Menu
2. Click “Export Design”
3. In the “Save as Type” menu select your machine format and click Save.

To summarize…
If you’ve made it through to the end of this post, congratulations! There was a lot of information to take in which can get slightly convoluted. However, the basis of saving files to a specific machine format is quite simple. In a nutshell, remember to “Export” your files instead of searching for your format under “Save as”. Also remember to save them, at first instance, as .EMB files. This will make it much easier to convert into your preferred machine format later. Just remember these basics and you’ll be able to whiz through the process like a pro!
If you have questions on your specific machine format, please email hatchsupport@wilcom.com and provide details of your machine and the format required. If you are working with a specific design in question, don’t forget to attach it, so our support department can help you more quickly!
We would love to hear your feedback! Leave a comment below.
The Hatch Team
Hatch Embroidery software is the fastest-growing embroidery software used in over 100 countries. It is time to join this global trend and give Hatch Embroidery a try! The 30-Day Free Trial gives you unlimited use of all the amazing features, and the 30-Day Money Back Guarantee ensures that there is absolutely no risk involved.
Related Articles
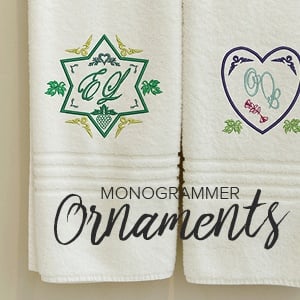
Learn All About Monogramming Ornaments
3 minute read
July 18th, 2016
Using ornaments with your monogramming adds a unique flair to your existing monograms and really kicks... more »
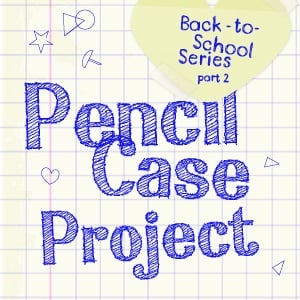
Free In-The-Hoop Pencil Case Project
6 minute read
August 15th, 2016
It is time for back-to-school, and we are always looking for something quick and inexpensive to make... more »
Back-To-School DIY Inspirations
4 minute read
August 15th, 2016
The new school year is just about to get started so there has never been a better time to get creative!... more »
New Hatch Update Features and Enhancements – Part 2
5 minute read
July 4th, 2016
Continuing from our last post, we’re taking you through all the other enhancements and additions to... more »


