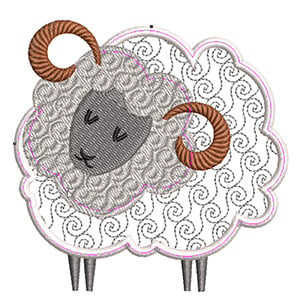
How to Use Curved Fills to Create Amazing Effects

Hatch Hatch
7 minute read

Listen to blog
Audio is generated by DropInBlog's Blog Voice AI and may have slight pronunciation nuances. Learn more

Take your embroidery to an entirely new level!

This blog article will give you an excellent overview of how to use curved fills to create amazing effects for your next embroidery project.

Hatch Embroidery software provides several techniques for creating curved stitching for your machine embroidery projects. Contour fill follows the contours of a shape, creating a curved, light and shade effect. Ripple fill is achieved by radiating a stitch pattern from a common central point. The Florentine effect can be applied to filled objects to create a flowing stitch effect along a digitized line. Radial fill generates radial turning stitching in most fill stitch types.

Contour Fills

Contour is a curved fill stitch type – stitches follow the contours of a shape, creating a curved, light, and shade effect. Use it to create a sense of movement in contrast to flatter fills created by satin or tatami stitching. It can be used with Circle or Digitize Blocks input tools.

Adjust stitch length for smoother or sharper curves. Adjust stitch spacing for denser or more open stitching.

Stitch angle has little effect on pattern layout, but the entry point in circle objects does.

Ripple Fills

Ripple Fill stitch is related to Contour stitch, providing a similar look (with a fixed number of lines and variable spacing) but spiraling out from the center of a filled object. It can be applied to any filled object. Stitch angle has no effect on pattern layout.

Adjust Stitch spacing for denser or more open stitching. Adjust Stitch length for smoother or sharper curves.

The center of the Ripple stitch can be moved with the Reshape tool.

If the object has a hole, this is ignored when Ripple is applied but still exists when other stitch types are applied.

Florentine Fills

The Florentine effect allows you to contour fill stitches along a digitized guideline. Stitches follow the line but maintain uniform density and needle penetration patterns.

Use smaller stitch lengths – e.g. 4.00 mm or less – for best results. Florentine can be combined with Embossed fill, Motif fill, and other fancy stitches for enhanced effect.

Use the Reshape tool to change the shape of the curve. Press <Enter> to finish.

Florentine fill can be applied together with Embossed fills (see above), Motif fills (see below) as well as Tatami patterns.

Radial Fills

Radial fill generates radial turning stitching in several stitch types such as satin and tatami stitch. Use tatami patterns to accentuate the effect. Stitches are generated from the outside edge to the geometric center.

Radial fill applies to several object shapes – closed, circle, and rectangle. Use the Reshape tool to modify the effect. The hole can be resized either interactively or via object properties. It can relocated using the positioning handle at the center.


Unlike Ripple fill, the center of Radial fill can be moved outside the shape or into an included hole to achieve a different effect. Different tatami patterns achieve different effects. It can also be applied together with various fancy fills.

Useful Tips

Not all patterns and stitch settings or objects (size-specific) are suitable for Radial fill. In particular, if you are using it with larger objects, use one or a combination of the following to avoid bunching at the center:

  • Increase the size of the hole
  • Move the center into an existing hole in the object, or move it outside the object altogether.
  • Add Feather Edge to the inside. See also Feather Edge.
  • Use larger stitch spacing – increase by about 20%.
  • Avoid patterns that add needle penetrations close to the center of the object.
  • Use Edge Run underlay with smaller objects, to help reduce the number of stitches at the object center. See also Stitch reinforcement.
  • For fewer problems and a better embroidery result, use an SUK or H/E embroidery needle if your machine can use these needle types.
  • For the best effect, use Radial fill with ring shapes. The size of the ring should be about 20% of the outer diameter.


You are not able to directly edit the stitch angles generated by Radial fill. However, you can apply the Break Apart tool to edit the resulting turning angle closed object.

3D Warp

Another way to create curved motif fills is with 3D Warp. Use it to make shapes appear concave or convex.

Using Globe In with 3D Warp gives a concave effect by increasing motif size and spacing around a center point. Globe Out gives a convex effect by decreasing motif size and spacing.

Use the Reshape tool to customize the shape of the 3D Warp envelope. You can apply the effect to an entire object, or to a specific part of the fill.

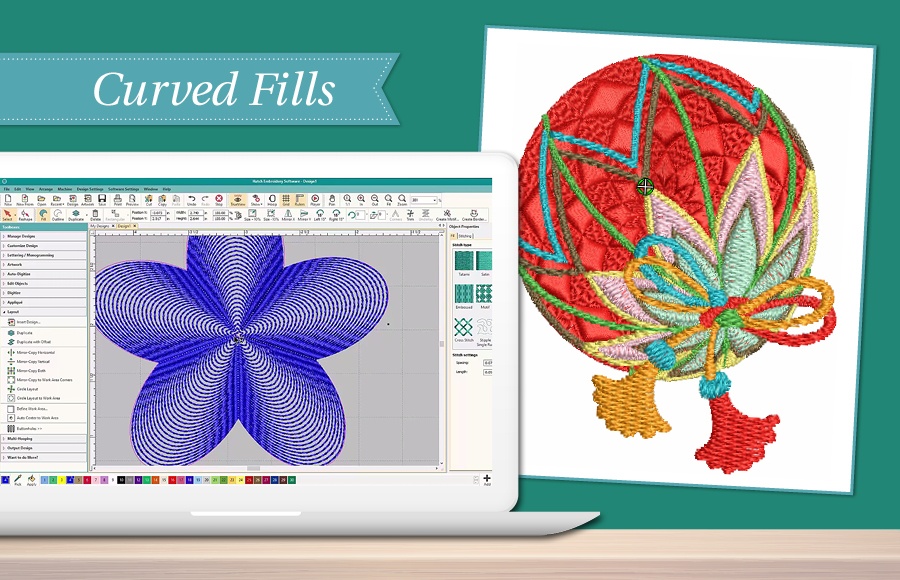
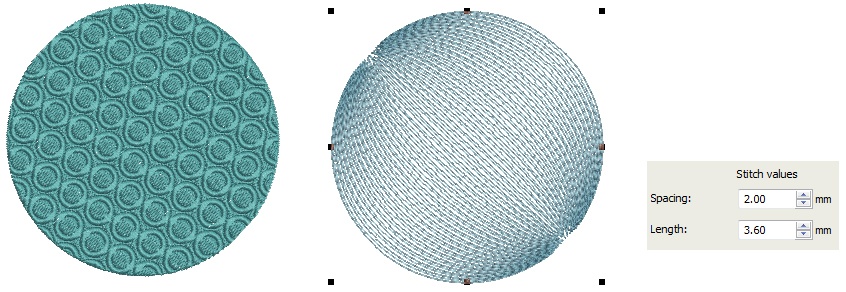
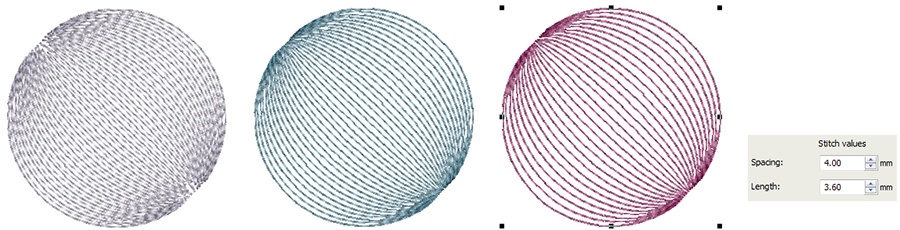
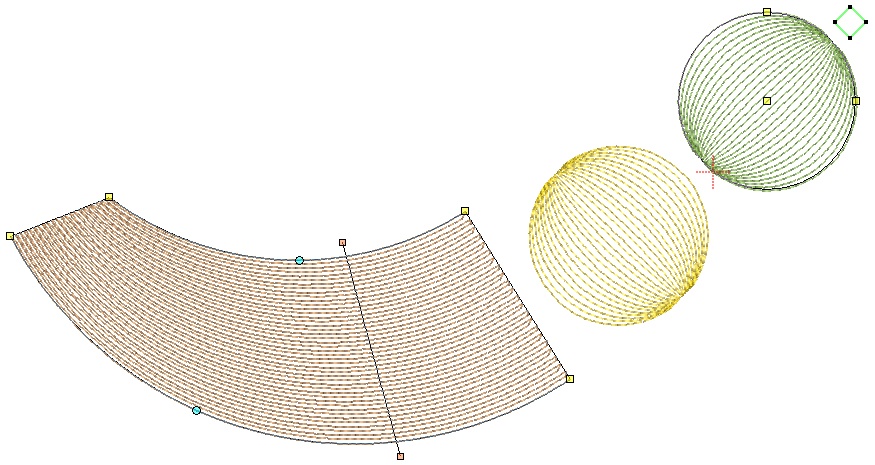
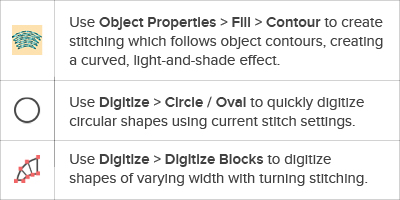
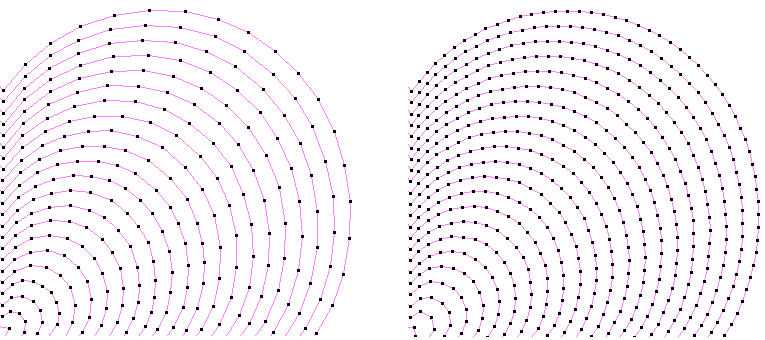
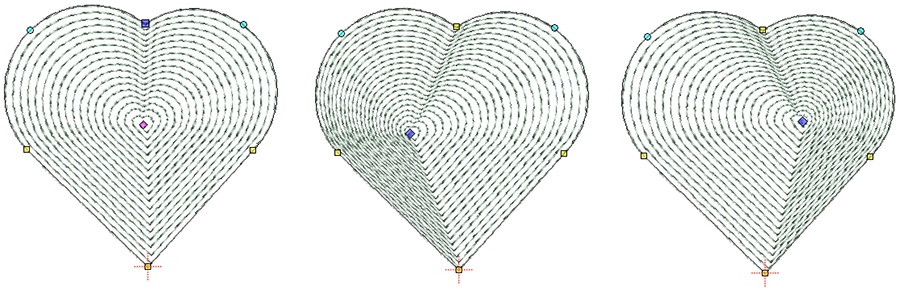
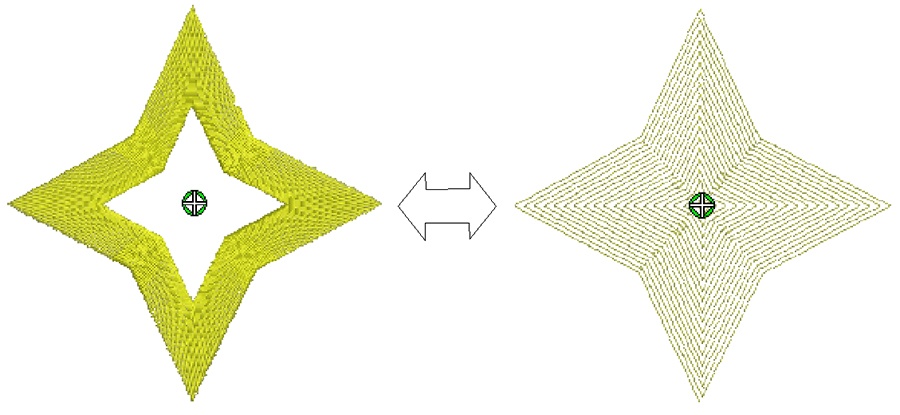
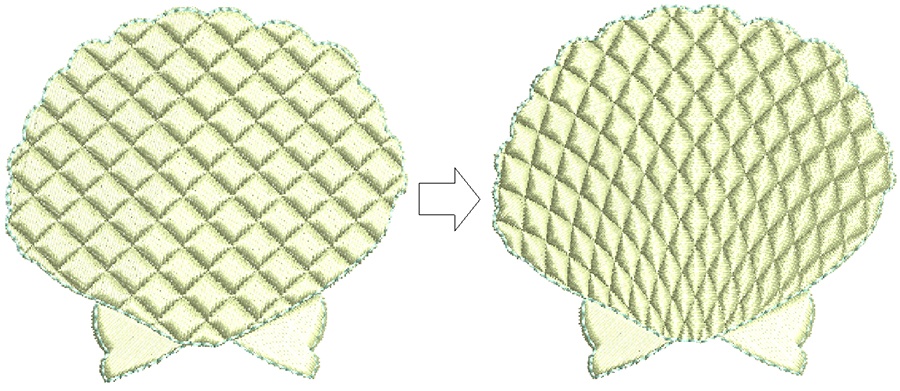
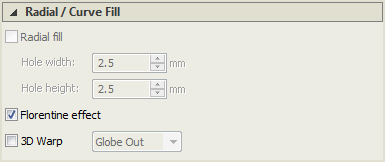
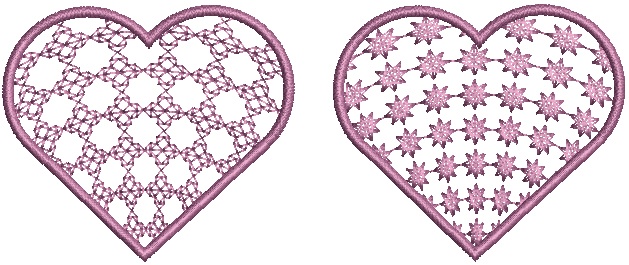
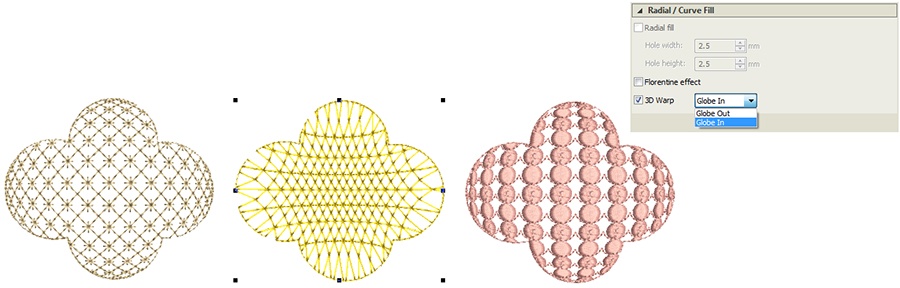
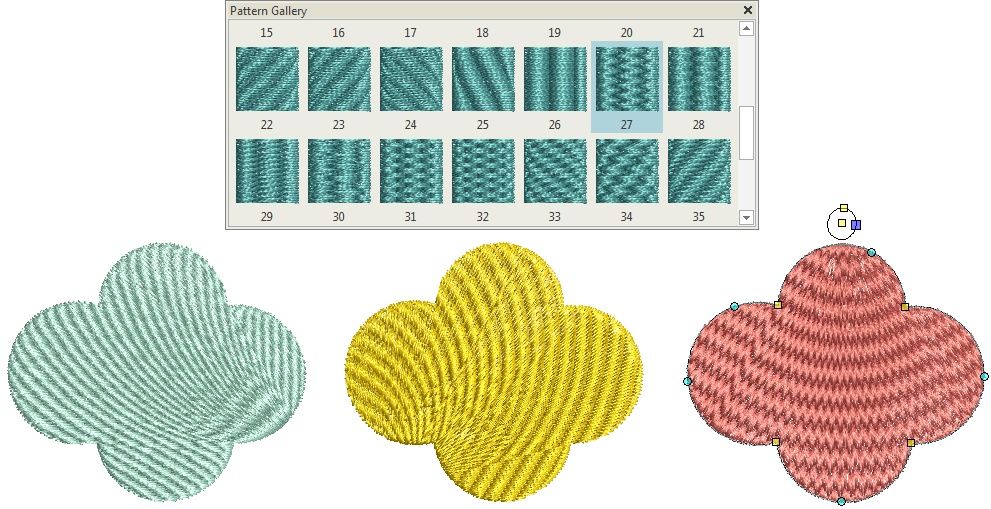
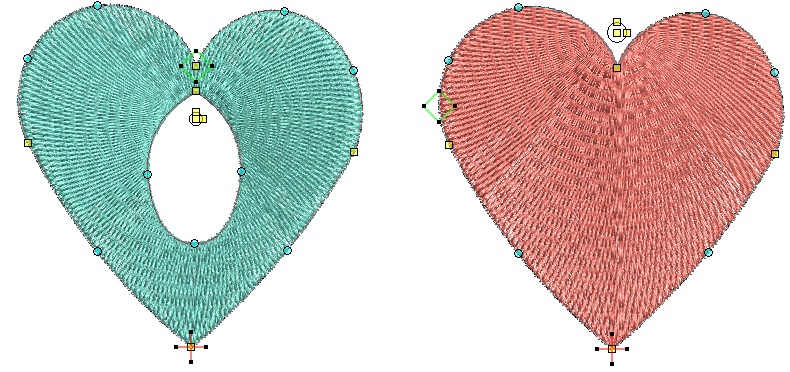
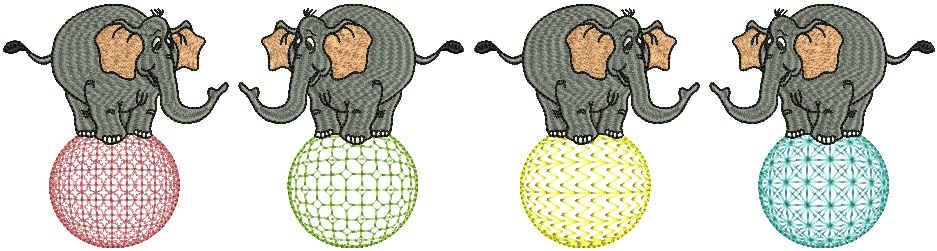
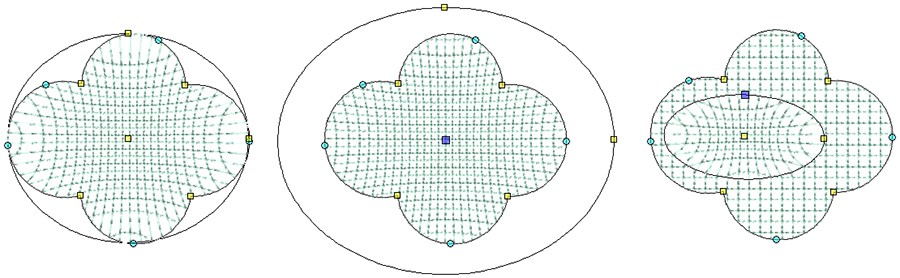
We hope that you found this blog both educational and inspirational so that you now have a clearer idea of how to use curved fills to create amazing effects.

Would you like to get the most of out your Hatch Embroidery software? You will find a wealth of information in the online User Guide.

Hatch Embroidery software has emerged as a top choice among embroidery enthusiasts and small business owners worldwide. Trusted by users in over 100 countries, it's swiftly become a leading solution in the embroidery software landscape. Whether you're a hobbyist looking to explore new creative avenues or a small business owner seeking to streamline your embroidery processes, Hatch Embroidery offers a range of powerful features to meet your needs. Join the global trend and experience the innovation and versatility of Hatch Embroidery for yourself!

The 30-Day Free Trial gives you unlimited use of all the amazing features and the 30-Day Money-Back Guarantee ensures that there is absolutely no risk involved.

Hatch Embroidery 30-Day Money-Back Guarantee:

At Hatch Embroidery, we understand the importance of confidence and satisfaction when investing in embroidery software. That's why we offer a 30-day money-back guarantee on all our software products. This guarantee allows customers to explore the features and capabilities of Hatch Embroidery software risk-free for a full month. If for any reason you're not completely satisfied with your purchase, you can request a refund within 30 days of the original purchase date.

Benefits for you:

Risk-Free Trial: The 30-day money-back guarantee provides you with a risk-free opportunity to try out Hatch Embroidery software. You can explore its features, experiment with designs, and evaluate its suitability for your needs without any financial risk.

Peace of Mind: Knowing that you have the option to request a refund within the specified timeframe provides you with peace of mind. You can make your purchase with confidence, knowing that if the software doesn't meet your expectations, you're covered by the money-back guarantee.

Flexibility: The money-back guarantee offers flexibility in your decision-making process. It removes any barriers or hesitations you may have about trying out the software, as you can easily request a refund if it doesn't meet your requirements.

Customer Satisfaction: By offering a generous return policy, we prioritize your satisfaction and aim to ensure that you and every customer have a positive experience with Hatch Embroidery software. Our commitment to customer satisfaction extends beyond the initial purchase, reinforcing our dedication to providing high-quality products and excellent service.

Overall, the Hatch Embroidery 30-Day Money-Back Guarantee is designed to empower you to make informed decisions and confidently invest in our software, knowing that your satisfaction is our top priority.

« Back