


Installing & setting up
Hatch Embroidery 4
Step-by-step help for installing Hatch Embroidery 4, adding antivirus exclusions, updating, resetting toolbars, and configuring CorelDRAW integration.
Back to all FAQ categoriesBefore running the installer, check the following:
- Windows 11 (64-bit) with the latest updates — Hatch 4 will not install on Windows 10 or earlier
- At least 40 GB of free disk space and a minimum 256 GB SSD
- An internet connection — required during installation for Windows component features and initial activation
- All other applications closed before running the installer
Visit hatchembroidery.com/download to get the installer, then follow these steps:
- Close all open Windows applications
- Run the installer file (right-click and select Run as Administrator if prompted)
- Follow the on-screen instructions — accept the default install location unless you have a specific reason to change it
- Select any additional language components if required
- Restart your computer when prompted — this step is mandatory
- After restart, double-click the Hatch Embroidery icon on your desktop
- Sign in with your registered email and password to activate
If the installer won't open or immediately closes, try these steps in order:
- Run as Administrator: right-click the setup file and select Run as Administrator
- Check Windows version: Hatch 4 requires Windows 11. It will not install on Windows 10
- Antivirus blocking: your antivirus may be blocking the installer. Temporarily disable it or add the setup file to exclusions before running
- Missing Windows components: ensure Windows 11 is fully up to date with all pending updates installed
If none of these resolve the issue, submit a support ticket with the exact error message.
Adding Hatch Embroidery to your antivirus exclusions prevents false-positive blocks that can cause slow startup, installation failures, or crashes. The steps vary by antivirus product, but generally:
- Open your antivirus software
- Find the Exclusions or Exceptions section (usually under Settings or Advanced)
- Add the Hatch Embroidery installation folder as an exclusion — typically
\Program Files\Hatch Embroidery - Also add the Hatch Embroidery data folder:
\ProgramData\Wilcom
Consult your antivirus documentation for exact steps, as the process differs between products like Windows Defender, Norton, McAfee, and others.
Hatch Embroidery checks for updates automatically when you launch the software with an internet connection. If an update is available, you will be prompted to download and install it.
If you need to check for updates manually, look in the Help menu for a Check for Updates option.
If your toolbars or dockers appear in unexpected positions, you can reset them to the factory default layout.
- Go to View > Toolbars in the Hatch Embroidery menu
- Select Reset Toolbars or Restore Default Layout
If you have customized your layout and want to preserve it, use Save Layout before resetting. You can restore your saved layout at any time.
Hatch Embroidery 4 integrates with two versions of CorelDRAW, available as GEM add-ons:
- CorelDRAW® Standard 2024 GEM
- CorelDRAW® Graphics Suite 2025 GEM
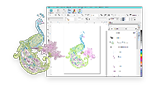
This integration enables direct vector file import and transfer between CorelDRAW and Hatch's Embroidery Mode.
Still having trouble?
Our support team can help.
Submit a ticket at help.hatchembroidery.com and we'll typically reply within one business day.