


Categories
ITH Halloween Masks Project: Spooky Vinyl Masks with Hatch Embroidery
![]()
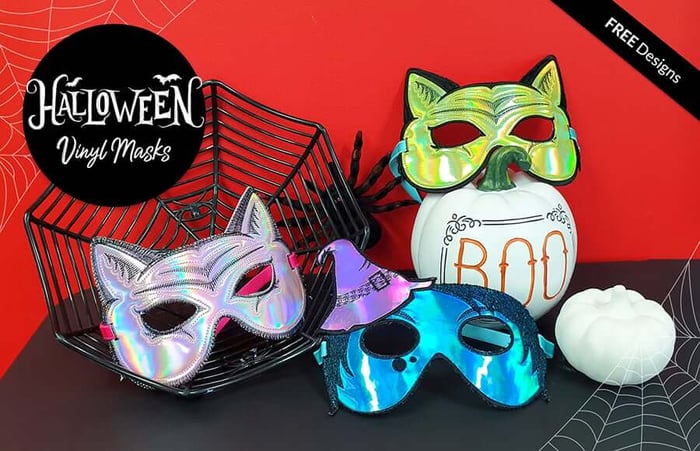
Table of Contents
- Step 1: Digitizing Your ITH Halloween Masks
- Step 2: Creating the Cutting File (SVG)
- Step 3: Organizing Your Design for Stitch-Out
- Step 4: Cutting the Vinyl
- Step 5: Setting Up for Stitch-Out
- Step 6: Stitching the Masks
- Step 7: Finishing Touches
- Final Thoughts
- Feeling Inspired? Try It Yourself!
- The definite choice when selecting embroidery software
- FAQs
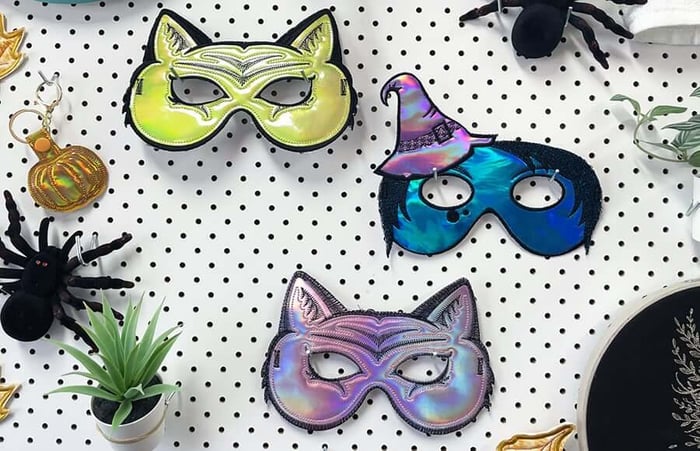
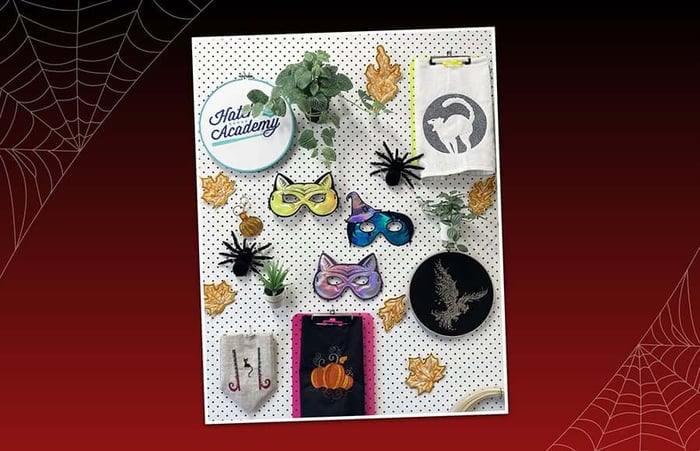
Halloween is the perfect excuse to get creative with your embroidery machine! This year, why not make your own ITH Halloween masks using Hatch Embroidery and vinyl? They’re fun, fast, and completely customizable - perfect for parties, trick-or-treating, or even themed photo booths.
In this tutorial, we’ll walk through how we digitized, cut, and stitched our Halloween masks using Hatch Embroidery and a Brother cutting machine. You’ll also pick up some great tips for working with vinyl and creating your own cutting files from embroidery designs.
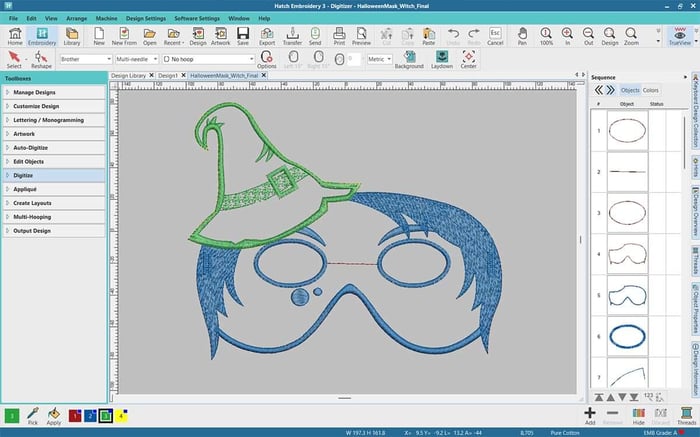
Step 1: Digitizing Your ITH Halloween Masks
When designing ITH projects like these ITH Halloween masks, the key is to work backwards, start by thinking about how you want the finished mask to look and feel, and then digitize with that in mind.
We began by creating the overall mask shape and adding texture and detail using motif fills and open density stitching. Vinyl is not as forgiving as fabric; too many needle penetrations can perforate it and cause tearing. That’s why it’s important to keep your stitching open and light. Using decorative motifs or running stitch details instead of dense fills gives your mask that spooky texture without compromising durability.
Think of it like planning an applique. You want to visualize each layer and stitch sequence carefully before you start sewing.
Step 2: Creating the Cutting File (SVG)
Once your design looks right in Hatch Embroidery, it’s time to generate the cutting file for your Brother machine.
To do this, select all the objects that form the mask outline. Then go to Create Outline and Offset and choose a 0 offset. This creates a perfect outline around your design. With this outline selected, you can export it as an SVG file ready to load into your Brother cutting software.
This outline serves two purposes:
1. As a cutting file for your vinyl, if you’re using an electronic cutter.
2. As a placement line in your embroidery sequence, if you prefer to cut manually.
If you plan to use the outline for placement, simply move that object to the beginning of your stitch sequence. That way, the placement line will stitch first when you run the design.
You can apply this same technique to any existing design in Hatch Embroidery. It’s especially useful for turning applique designs into ITH projects or when you want precision-cut shapes for materials like vinyl, felt, or cork.
Step 3: Organizing Your Design for Stitch-Out
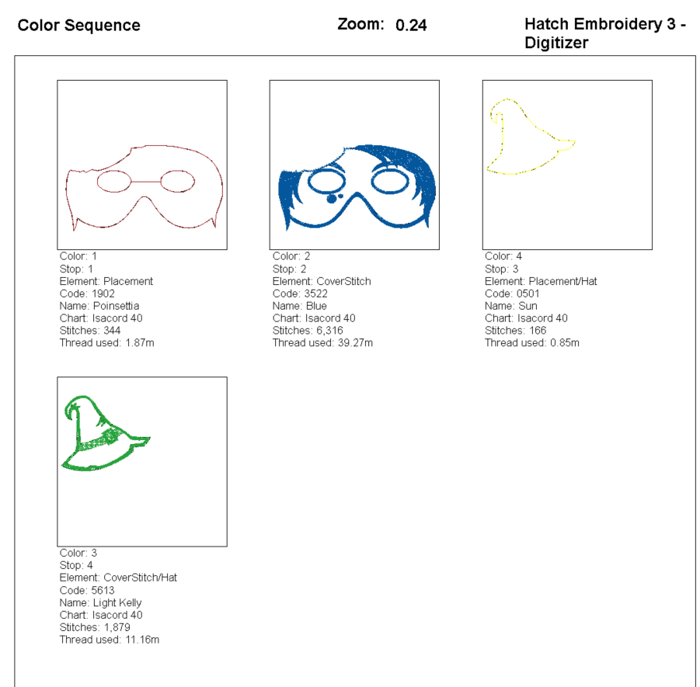
A little organization goes a long way during stitch-out. Before exporting your design, open the Design Information panel in Hatch Embroidery. Under Thread Colors, rename each color block or element (for example, “Placement Line”, “Cover Stitch”).
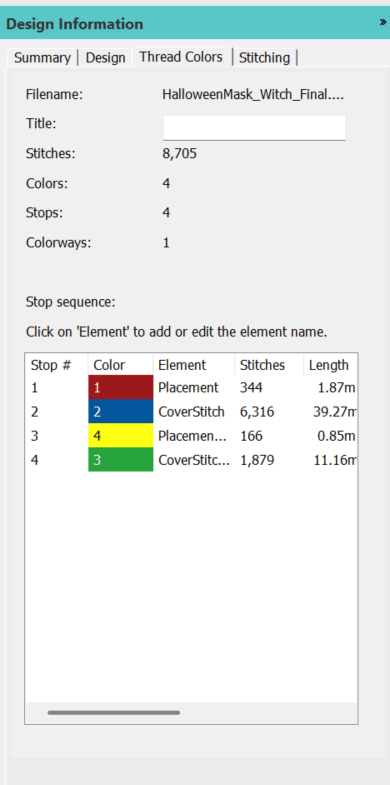
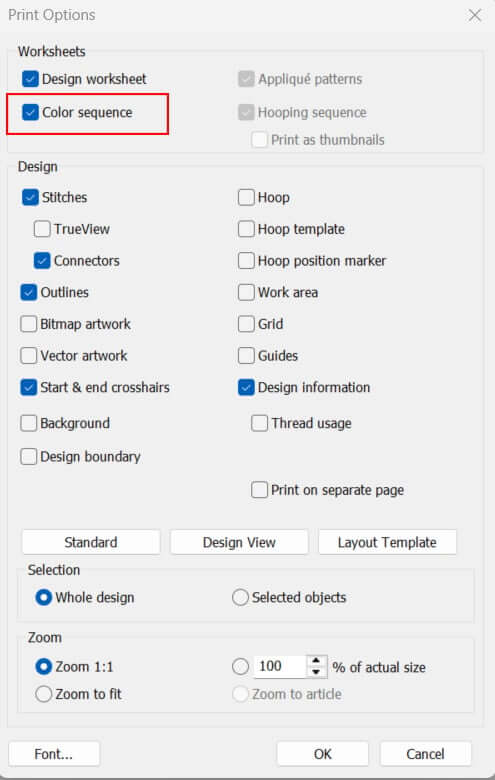
When you print your worksheet, make sure Color Sequence is checked so you can easily follow along during stitching. This simple habit saves confusion at the machine and helps you keep track of each element, especially for layered designs like masks.
Step 4: Cutting the Vinyl
For this ITH Halloween masks project, we cut our vinyl using a Brother cutting machine. It’s fast, accurate, and gives perfectly crisp edges. If you don’t have a cutter, you can absolutely treat it like an applique - stitch your placement line, lay your vinyl on top, and carefully trim around the outline with small sharp scissors.
Whichever method you use, vinyl tends to shift slightly during embroidery. To help hold it in place, lightly spray the back of the vinyl with temporary spray adhesive before stitching. This keeps everything secure and smooth while your machine runs.
Step 5: Setting Up for Stitch-Out
For ITH projects like these ITH Halloween masks, a tearaway stabilizer works best. Hoop a single layer tightly and make sure it’s smooth and wrinkle-free.
We used white stabilizer for our masks, but we quickly realized that black stabilizer would make the edges look even more crisp, especially when working with darker vinyls. If you only have white on hand, you can also run a black permanent marker along the outer edge of your finished mask to hide any visible white edges. It’s a quick and easy trick for a more professional finish.
Step 6: Stitching the Masks
Load your design into your embroidery machine and start with the placement line if you’ve added one. Then lay your vinyl on the hoop (right side up) and secure it with a light spray of adhesive.
Run your embroidery sequence following your color worksheet. Because vinyl doesn’t fray, you won’t need any satin borders or finishing seams, but be sure to use a slightly longer stitch length for decorative areas to reduce perforation.
When the embroidery is complete, carefully remove the project from the hoop and tear away the stabilizer.
For the eye openings or elastic holes, use a small sharp pair of scissors or a buttonhole chisel to cut them open. These details can be difficult to access with a seam ripper, so take your time and be precise.
Step 7: Finishing Touches
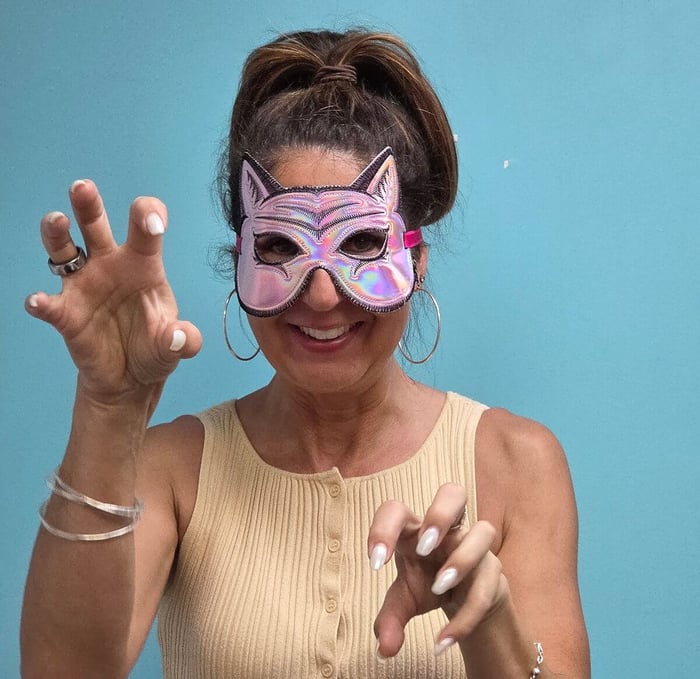
Thread elastic or ribbon through the buttonholes, and your ITH Halloween masks are ready to wear!
You can personalize each mask with different vinyl colors, stitches, or even glitter accents. Try metallic threads for a glamorous witch, or black vinyl with orange stitching for a classic pumpkin look. Once you’ve mastered the technique, you can adapt it to create animal masks, superhero masks, or even masquerade-style designs, all in-the-hoop!
Final Thoughts
Creating ITH Halloween masks with Hatch Embroidery is a fantastic way to explore both *digitizing and crafting techniques. By combining your embroidery skills with vinyl and cutting technology, you can produce professional-looking accessories that are sturdy, stylish, and fun.
Best of all, the workflow you’ve learned - from digitizing the outline and exporting SVGs to stitching with vinyl - can be applied to countless other ITH projects. Whether it’s key fobs, ornaments, or costume pieces, Hatch Embroidery gives you the flexibility to turn your creative ideas into perfectly stitched, ready-to-wear designs.
So fire up your embroidery machine, grab some spooky vinyl, and get ready to stitch up Halloween magic right in the hoop!
🎥 Watch the recorded YouTube Live
Feeling Inspired? Try It Yourself!
Whether you're inspired by the seasons or dreaming up your own theme, Hatch Embroidery Digitizer gives you all the tools to turn your vision into a stitched work of art. From motif fills to personalized lettering and quilting tools, the possibilities are as endless as your creativity.
We’d love to see what you make. Share your embroidered quilts with us in our Facebook group. We’re always thrilled to celebrate the creativity of the Hatch community.
⭐⭐⭐⭐⭐
The definite choice when selecting embroidery software
Hatch Embroidery software is a comprehensive embroidery design solution that offers a range of tools and features for both beginners and seasoned embroiderers.
Here’s why it's a great choice:
- User-Friendly Interface: The software is designed with a user-friendly interface that makes it easy for anyone to start creating beautiful embroidery designs, regardless of their experience level.
- Powerful Editing Tools: It provides powerful editing tools that allow users to resize, edit, and adjust embroidery designs with precision. This is essential for businesses that need to customize designs according to specific customer requirements.
- Wide Range of Formats Supported: Hatch Embroidery supports a wide range of machine file formats, making it versatile for use with different embroidery machines. This flexibility is crucial for businesses operating with multiple machine types.
- Professional Quality: The software generates professional-quality stitches, ensuring that the end products are of high quality, which is vital for maintaining customer satisfaction and business reputation.
- Extensive Design Features: With features like auto-digitizing, lettering, monogramming, and even special effects, businesses can offer a wide range of embroidery services, increasing their market appeal and potential revenue streams.
- Regular Updates and Support: Hatch provides regular software updates and robust customer support, ensuring that businesses can always access the latest features and get help when needed.
Overall, Hatch Embroidery software equips you with the tools necessary to create stunning, high-quality embroidery designs efficiently and effectively, enhancing productivity and customer satisfaction.
Hatch Embroidery software products are in popular use in over 120 countries. It is time to join the global trend and give Hatch a try! The 30-Day Free Trial grants you unlimited use of all the amazing features and the 30-Day Money-Back Guarantee ensures that there is absolutely no risk involved. In fact, choosing Hatch Embroidery software is one of the smartest things you can do when selecting suppliers and supplies for your home embroidery business.
Enjoy over 80 FREE lessons presented by our own embroidery experts in Hatch Academy. Grow your confidence and embroidery skills fast to start creating your own beautiful designs in no time!
 |  |  |  |
| Hatch Academy over 80 FREE Lessons | 30-Day | Money-Back Guarantee ease of mind | Hatch FlexPay monthly instalments |
FAQs
What does ITH mean in embroidery?
ITH stands for In-the-Hoop. It refers to embroidery projects that are entirely (or mostly) stitched and assembled within the embroidery hoop. With ITH, your machine does the hard work - stitching seams, outlines, and details - so you end up with a finished project straight from the hoop.
What type of vinyl should I use for ITH masks?
Use embroidery-safe vinyl or marine vinyl that’s soft, flexible, and easy to stitch through. Avoid thick or heavily textured vinyls that can cause needle deflection or skipped stitches. Always test your stitch density first — open stitches work best to prevent perforation.
Do I need a cutting machine for this project?
No, but it helps! We used a Brother cutting machine to precisely cut the mask shapes from an SVG file exported from Hatch Embroidery. If you don’t have a cutter, you can still complete this project using the applique method - stitch a placement line, lay your vinyl on top, and carefully trim around the edge.
What stabilizer should I use for vinyl ITH projects?
A medium to heavy-weight tearaway stabilizer is ideal. It supports the stitches during embroidery but removes cleanly afterward. If you’re using dark vinyl, black tearaway gives the cleanest edge, while white stabilizer can be touched up with a black marker if needed.
How do I make sure my mask stitches don’t perforate the vinyl?
Keep your stitch density low and use open fills, motif stitches, or running lines rather than dense satin areas. Vinyl behaves differently from fabric — too many needle holes close together can cause tearing. Always use a new, sharp needle (such as a size 75/11 embroidery or 80/12 leather needle).
Can I apply this ITH technique to other designs?
Absolutely! The same process - creating an outline, exporting as SVG, and digitizing with open stitching - works beautifully for key fobs, ornaments, bookmarks, and more. Hatch Embroidery makes it easy to adapt existing designs into new ITH projects with just a few tweaks.
Related Articles
Creating Simple Monograms in Hatch Embroidery Software – FREE Monogram Design
This demo monogram design is available to download at the end of this article. Hatch Embroidery... more »
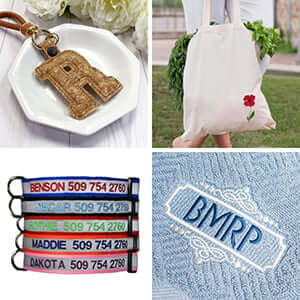
Lettering with Hatch Embroidery: Personalization for Profit
If you run a home-based embroidery business, one of the most powerful ways to win customers and... more »
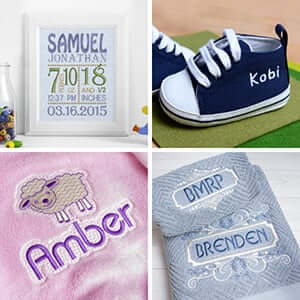
The Top 6 Best-Selling Embroidered Items for Home Businesses
Starting an embroidery business from home can feel overwhelming at first. What products should you focus on?... more »

Bundling and Upselling to Boost Profit
Running an embroidery home business is incredibly rewarding. You get to be creative, flexible, and build... more »