Machine Embroidery on Stuffed Animals

Hatch Hatch
3 minute read

Listen to this interesting Hatch Blog
Audio generated by DropInBlog's Blog Voice AI™ may have slight pronunciation nuances. Learn more


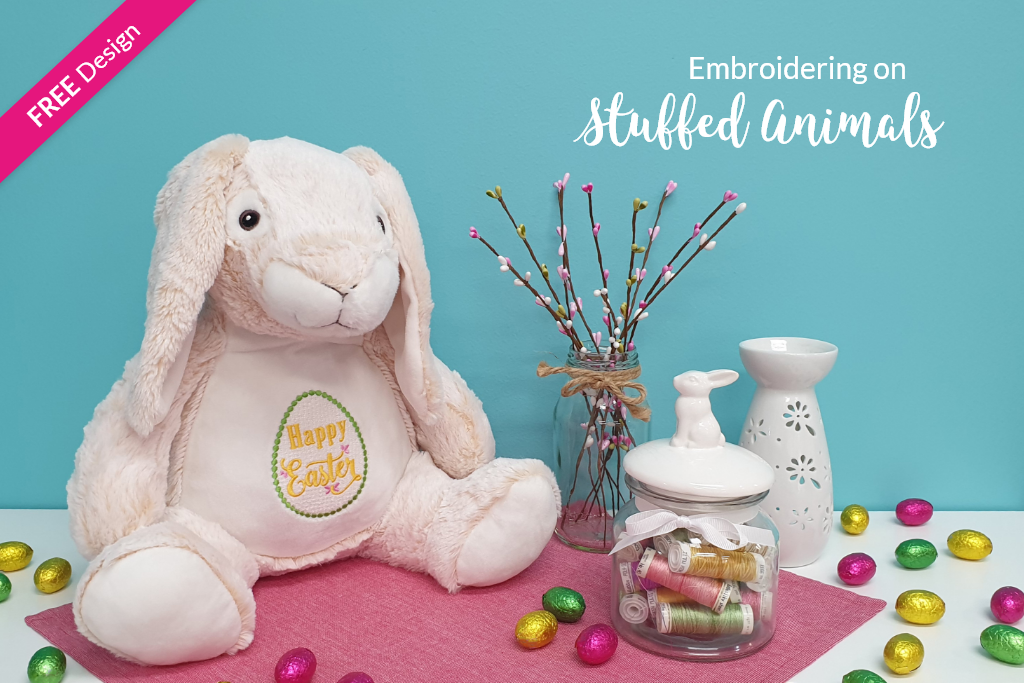
Firstly, it is important to know that you need a special kind of stuffed animal toy if you want to do machine embroidery on it, because you will need to remove the stuffing to hoop it. A simple internet search for “embroiderable stuffed animals” will provide a number of suppliers you can order from.


Getting Ready to Embroider

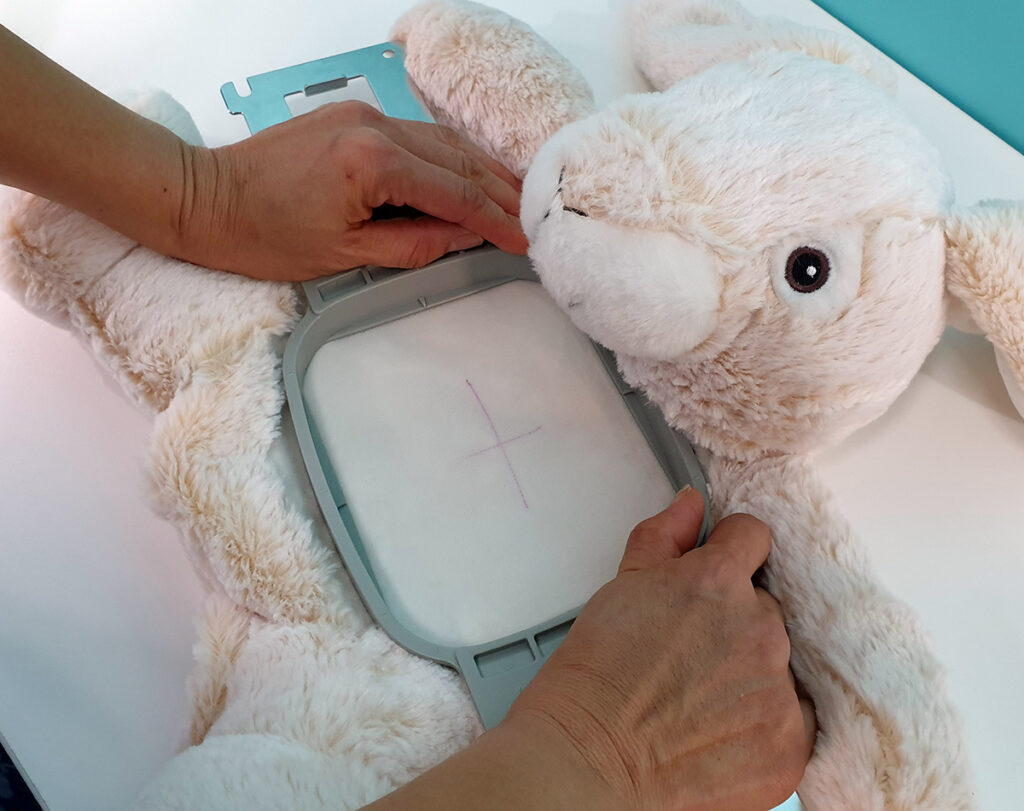
Find a hoop that will suit the size of the embroidery area on the belly. I used a 100×100 Brother hoop for this project.

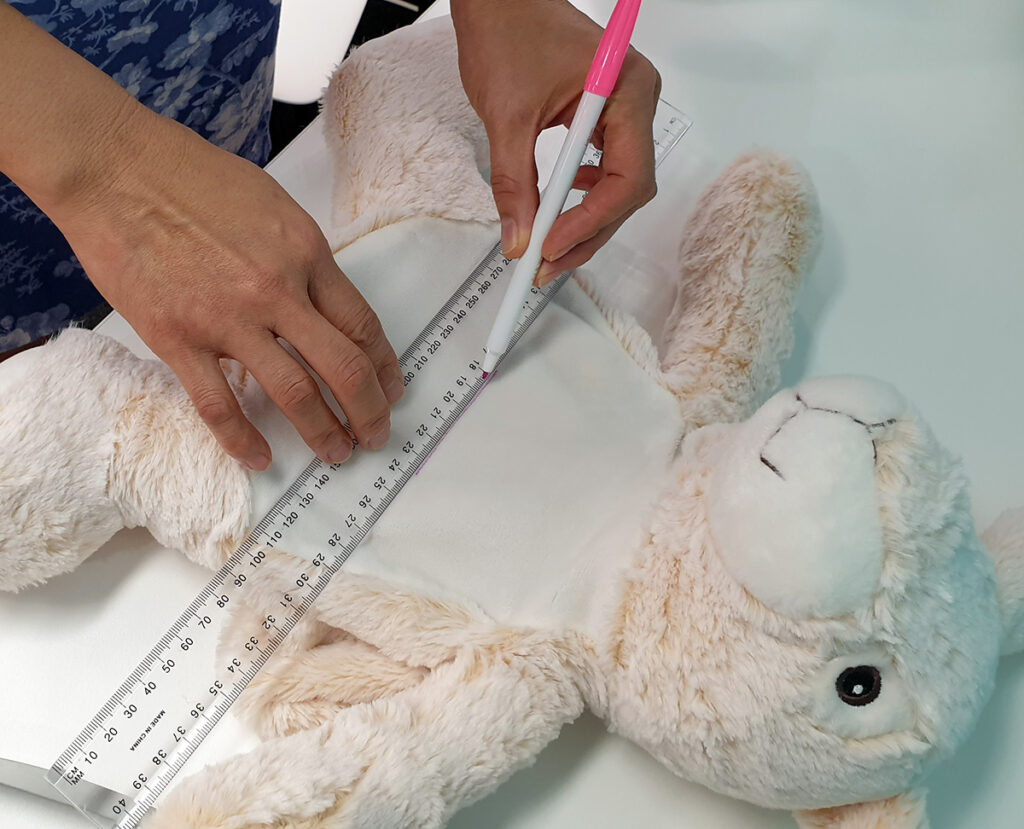
Remove the stuffing from the belly, and measure out the middle of the area you want to embroider. Make a cross with a temporary marker and line up your hoop accordingly.


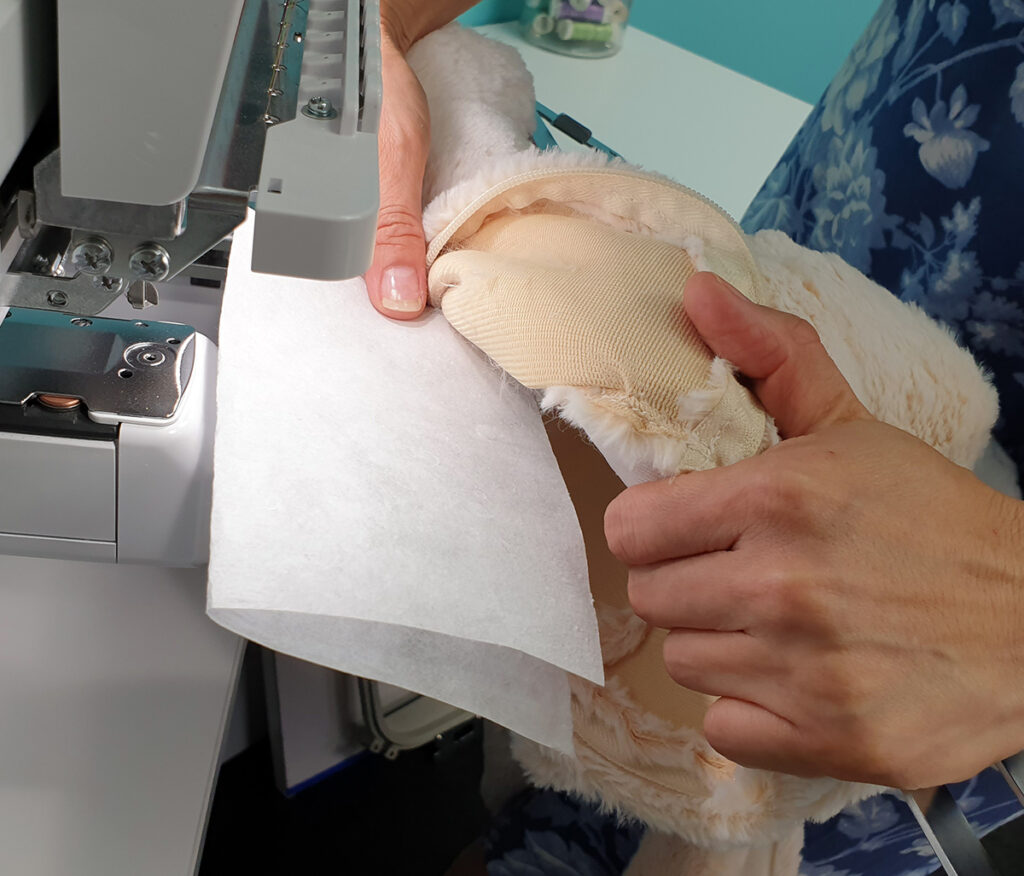
Slide 2 layers of tearaway stabilizer underneath the hoop before attaching it to your embroidery machine.


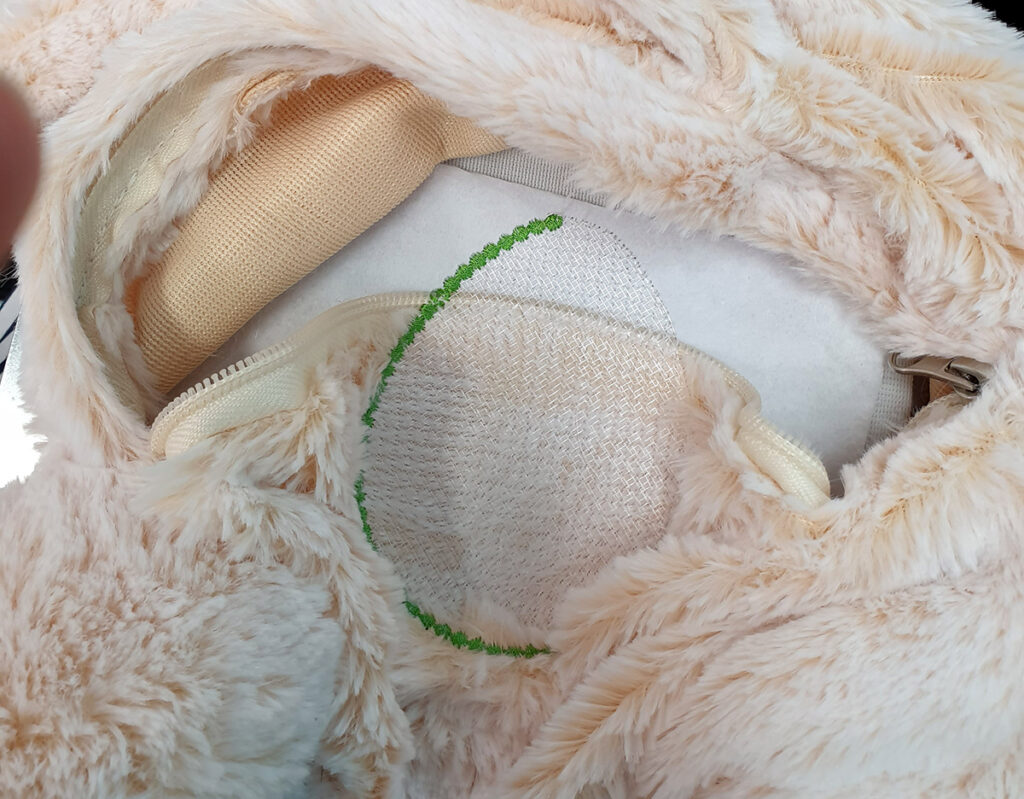
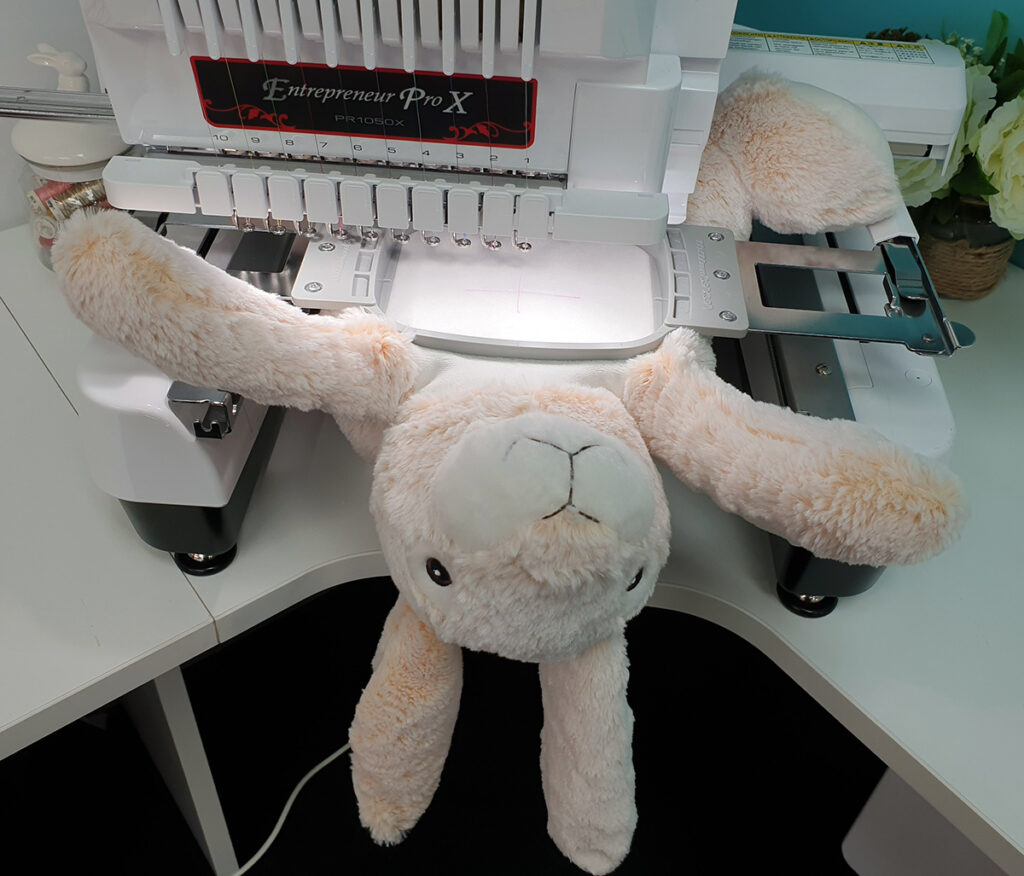
Make sure the back fabric of the toy is not caught under the front fabric that you will embroider on. It is an utter nightmare unpicking the embroidery if that happens. Trust me, I’m talking out of experience. 


😜


The image below is of my first attempt at embroidering the bunny, and I’m just glad I noticed what was happening way before the whole design got stitched out! 


Important: You will need to turn your embroidery design upside down in Hatch Embroidery or when setting it up in your machine, because your stuffed animal will be upside down too.


Creating the Easter Egg Design

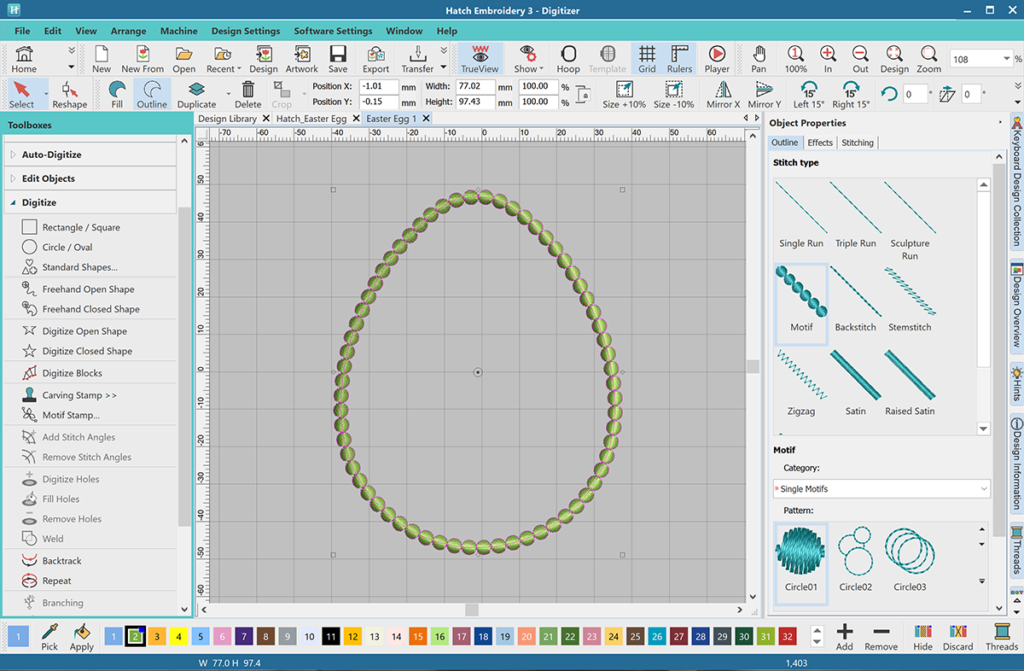
I digitized the outline of the Easter egg first and then changed it to Motif (Single Motif Circle 01) in the Object Properties Toolbox on the Outline tab.


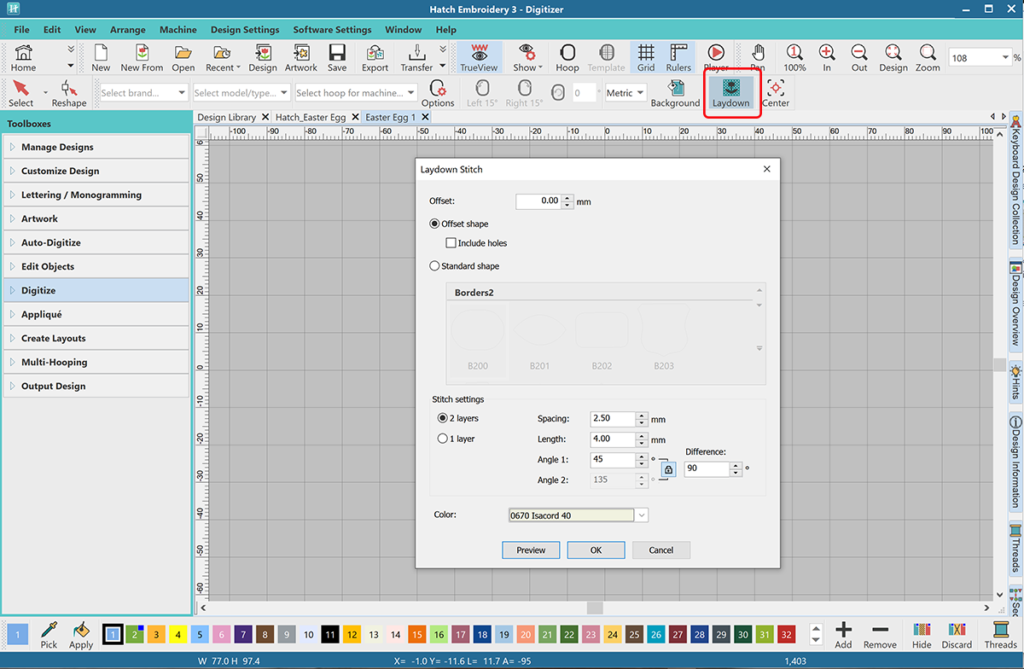
Hatch Embroidery has a wonderful tool called Laydown Stitch which is very handy when you embroider on high pile fluffy fabrics such as blankets, terry toweling or faux fur. It creates a mesh object that follows the outline of your design and it will push the fuzzy fabric or faux fur down, so the embroidery doesn’t sink and get lost in it. 

Without selecting the object, I clicked the Laydown icon in the toolbar on the top of your screen. I changed the Offset to 0 and the color to cream to match the fur.


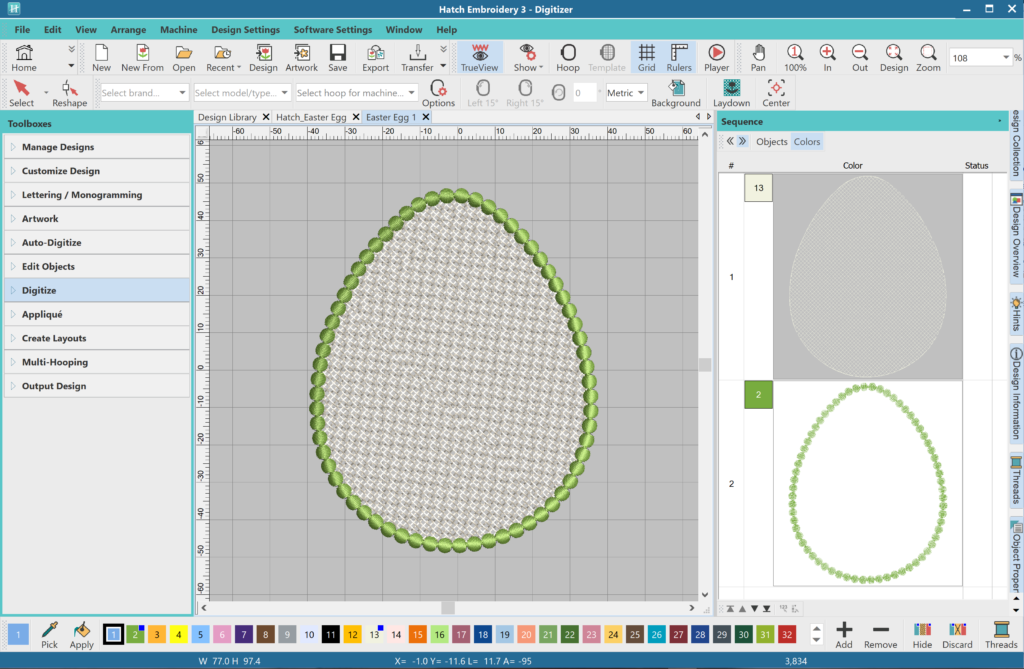
The laydown stitch object will automatically be placed in the first position of the stitch sequence.


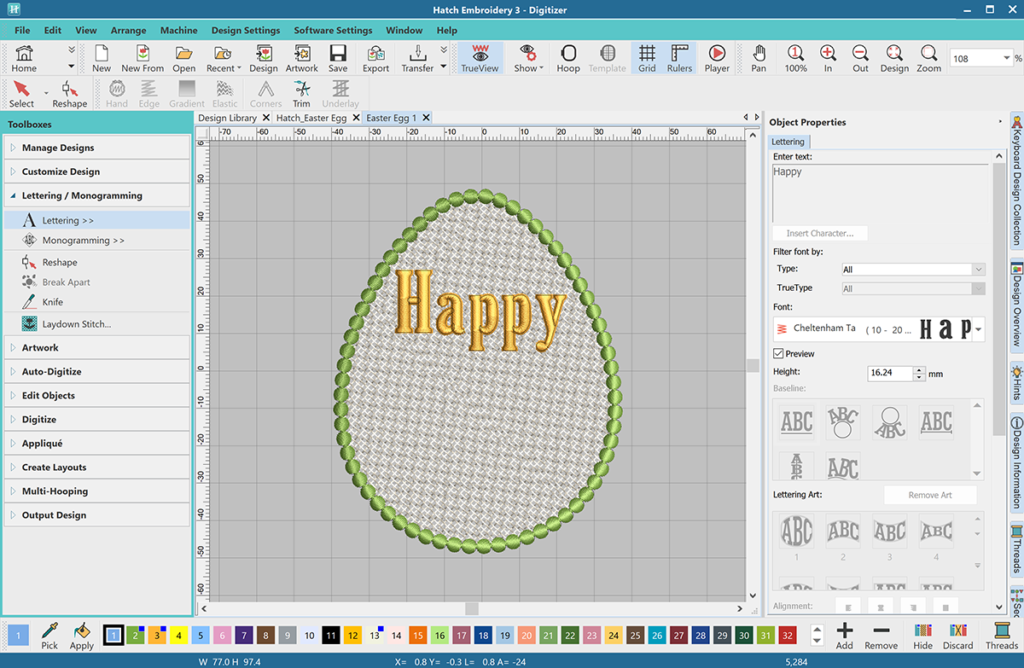
I used the Lettering tool in the Lettering/Monogramming toolbox to create the word Happy. I selected the Cheltenham Tall font.


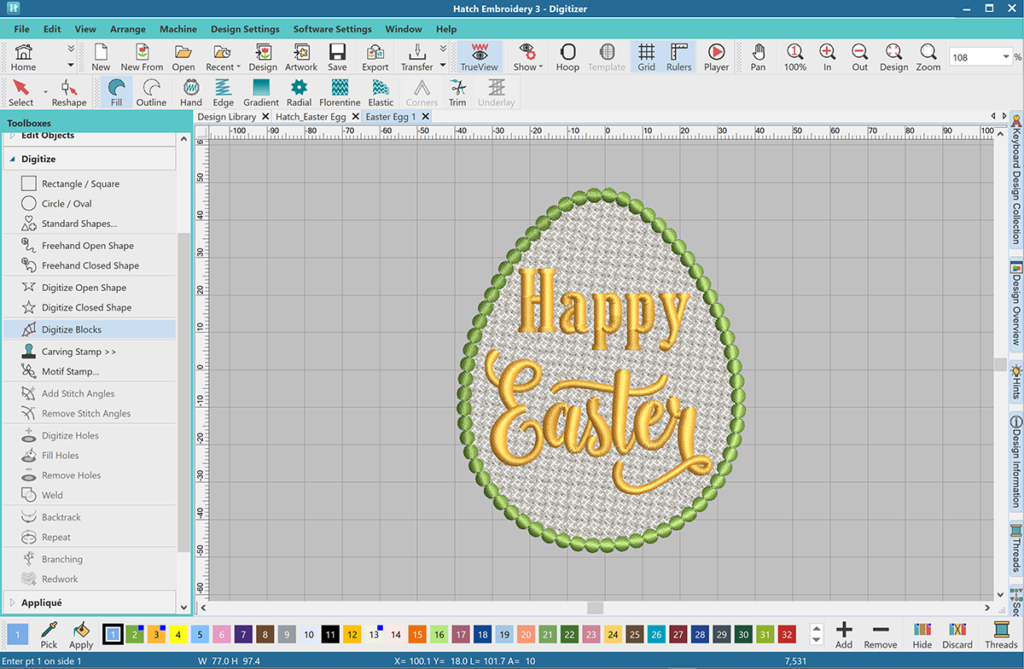
I manually digitized the word Easter using the Digitize Blocks tool in the Digitize toolbox. It is a great tool to digitize columns of varying width with turning stitches.


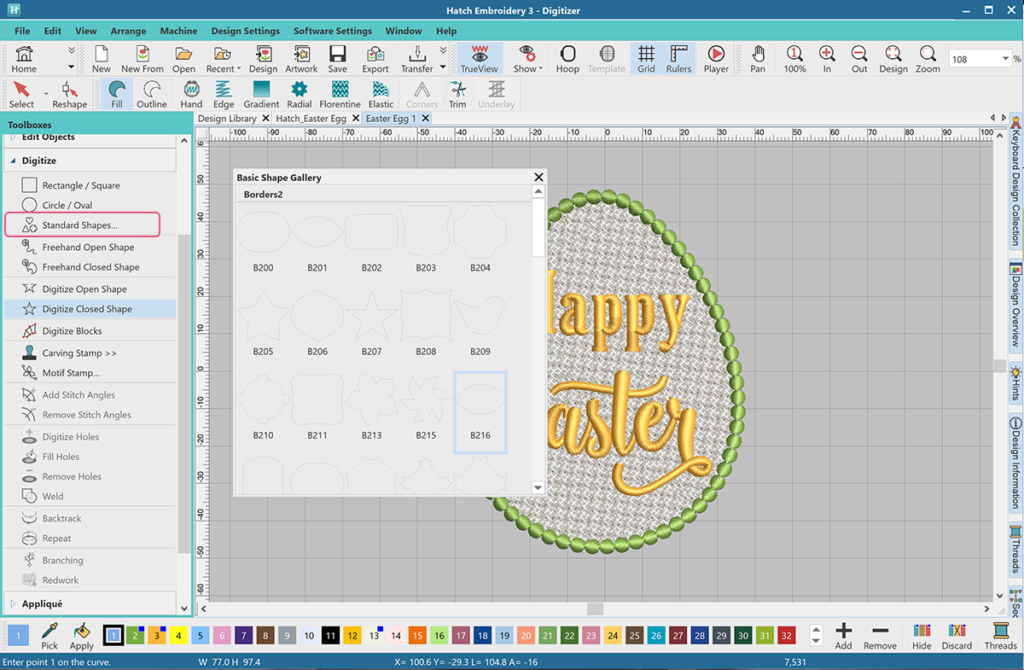
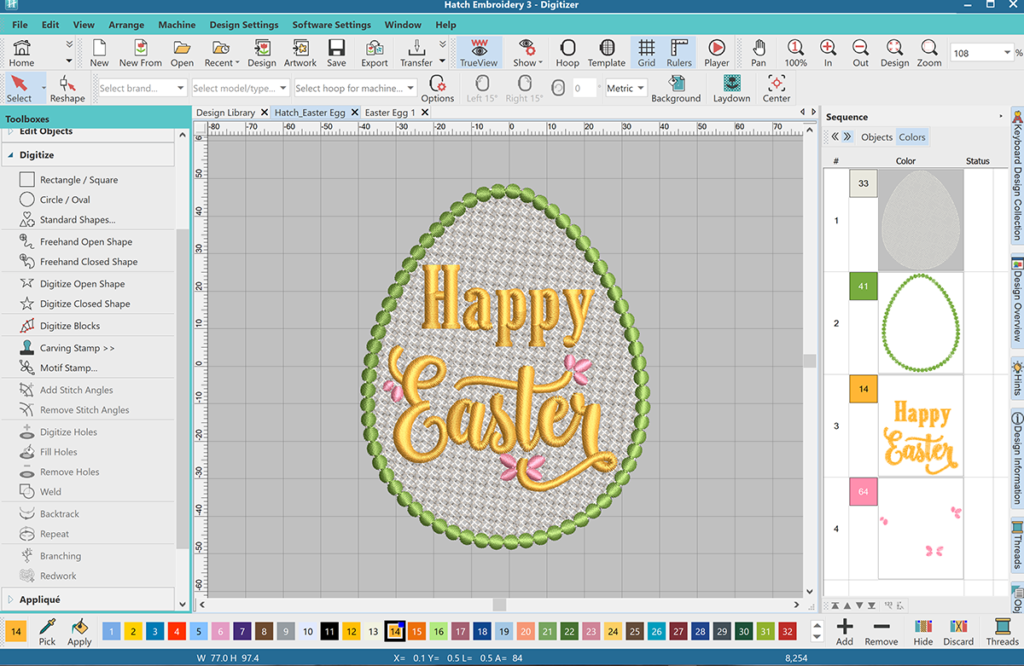
To add the floral decorative elements, I selected the B216 shape from the Standard Shapes tool in the Digitize toolbox. I changed the stitch to Satin, the color to pink and adjusted the stitch angle. I made 7 more copies and arranged them in the design. I slightly resized a few of them.


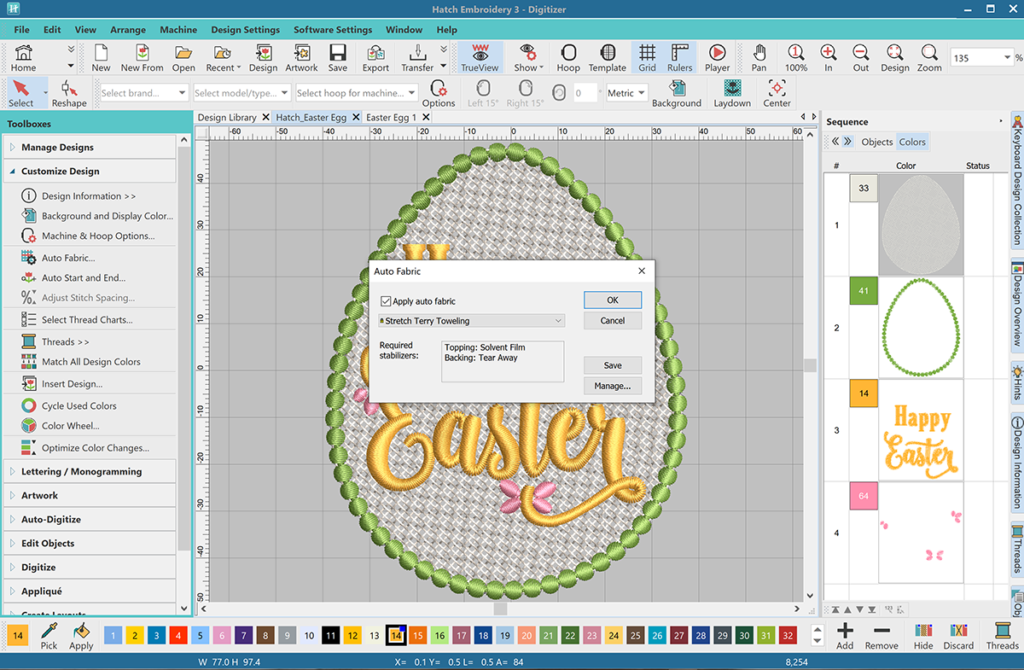
Finally, I used the Auto-Fabric tool in the Customize Design toolbox to recommend the best stabilizer and make adjustments to the design to suit the fabric. Although it was recommending a soluble topping, by adding the Laydown Stitch, I actually avoided having to use it.


Hatch Embroidery software products are in popular use in over 100 countries. It is time to join the global trend and give Hatch a try! The 30-day Free Trial grants you unlimited use of all the amazing features and the 30-day Money Back Guarantee ensures that there is absolutely no risk involved.


Hatch Academy
over 200 FREE Lessons
30-Day FREE Trial
all the tools & features
Money-Back Guarantee
ease of mind
FlexPay
monthly instalments

The definite choice when selecting embroidery software

Hatch Embroidery software is a comprehensive embroidery design solution that offers a range of tools and features for both beginners and seasoned embroiderers.

Here’s why it's a great choice:

  • User-Friendly Interface: The software is designed with a user-friendly interface that makes it easy for anyone to start creating beautiful embroidery designs, regardless of their experience level.
  • Powerful Editing Tools: It provides powerful editing tools that allow users to resize, edit, and adjust embroidery designs with precision. This is essential for businesses that need to customize designs according to specific customer requirements.
  • Wide Range of Formats Supported: Hatch Embroidery supports a wide range of machine file formats, making it versatile for use with different embroidery machines. This flexibility is crucial for businesses operating with multiple machine types.
  • Professional Quality: The software generates professional-quality stitches, ensuring that the end products are of high quality, which is vital for maintaining customer satisfaction and business reputation.
  • Extensive Design Features: With features like auto-digitizing, lettering, monogramming, and even special effects, businesses can offer a wide range of embroidery services, increasing their market appeal and potential revenue streams.
  • Regular Updates and Support: Hatch provides regular software updates and robust customer support, ensuring that businesses can always access the latest features and get help when needed.

Overall, Hatch Embroidery software equips you with the tools necessary to create stunning, high-quality embroidery designs efficiently and effectively, enhancing productivity and customer satisfaction.
« Back