Categories
Raised Machine Embroidery
Hatch
Blog
April 8th, 2024
3 minute read

It is really easy to create machine embroidery designs that include lettering with Hatch Embroidery. In this blog, we will demonstrate how to create a raised machine embroidery effect.
I used fonts for this cheerful design from two of the Font Packs that are available for purchase on our website.
Summer – Script Love from Font Pack #12
Vibes – Outline Block from Font Pack #22
You can change the fill type of lettering with Hatch Embroidery. However, please note that certain fill types work best for lettering with even width on the individual letters. Make sure you always do a test stitch out before embroidering on your item to make sure it looks all good. If needed make adjustments or change the fill type.

I wanted to avoid the dark stripes showing through the fabric, so I created two layers of the larger objects and used tatami fill. I changed the stitch angles 90 degrees on the top layer, so the stitches of the top object don’t sink into the stitches of the bottom one. I removed the underlay from both objects. It created a 3D-raised effect. The embroidery became quite thick and rigid, but the fabric was also thick, so it could hold the heavier-than-usual embroidery. It might not be everyone’s cup of tea, but I quite like the density and texture. It also makes the embroidery slightly elevated, which gives it a bit of extra dimension. I just used the default stitch density setting, but the stitch density can be changed in Hatch Embroidery as needed.
If you embroider on thinner fabric and want to avoid the pattern showing through, it’s a good idea to adjust the density of the underlay and/or the object. You can also float one sheet of tear-away stabilizer before stitching the underlay, then tear it away after the object is stitched out. In this case, you don’t need to have two layers of the same object, but you will avoid overly heavy embroidery on your fabric.
On the topic of stabilizer, I floated a water-soluble stabilizer on the top of the fabric to avoid the needle splitting it.
I wrote a blog a while ago about this Pineapple design and how I used the Sequence tool to ensure the objects were stitched out in order. You can read it here and also access the free design.

Hatch Embroidery software products are in popular use in over 100 countries. It is time to join the global trend and give Hatch a try! The 30-day Free Trial grants you unlimited use of all the amazing features and the 30-day Money Back Guarantee ensures that there is absolutely no risk involved.
Related Articles
10 Best Ways to Use Scraps for more Sustainable Embroidery
5 minute read
April 8th, 2024
You don’t have to buy a bunch of new materials each time you want to start a new project! By... more »
9 Ways to Get Help When Using Hatch Embroidery
5 minute read
April 8th, 2024
As the perfect starting point, we created over 200 free expert embroidery lessons at Hatch Academy to... more »
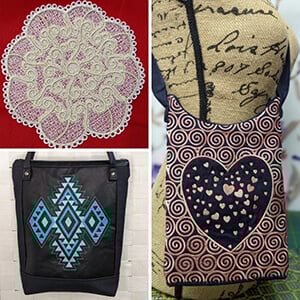
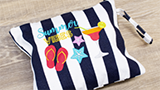
Barbara’s Embroidered Bags
6 minute read
April 8th, 2024
I came across Barbara Baugh’s Embroidered Bags in the Hatch Facebook Group. Their uniqueness,... more »
Celebrating St Patrick’s Day with Great FREE Embroidery Designs
2 minute read
April 8th, 2024
St Patrick’s Day is fast approaching and I wanted to create a nice new design to celebrate it.... more »


