Taking the Guesswork out of Monogram Placement

Hatch
Blog | How to | Inspiration
4 minute read
General rules and downloadable guide

Monogram History
If you look around, you will always find monograms somewhere. I was wondering how monograms came about. My colleague, Jenny, who loves to do research, did a bit of digging for me. This is what she found:
“Monogramming dates back to the Ancient Romans, who used them as identification labels on currency, something which has carried into the modern day. A little more recently, monogramming was something that only upper class families used to brand and identify their belongings. However things have indeed changed, with monograms being readily available to almost everyone today through multiple methods.”
“Sometimes monogramming can take the form of symbols rather than just letters. Symbolic monograms date back as far as lettered monograms and today many people use symbolic monograms or logos to represent a number of different things including brands, families and individuals.”
5 Things To Do First
Believe it or not, there is such a thing as “Monogram Etiquette”. It is a fun way to work in a traditional flair into your lettering. The guidelines vary across the board, depending on what you are going to monogram.
1. Decide who you will monogram for
a. Male, Female, Couple
b. Adult, Children
c. Couples, Individuals
2. Will it be letters or a name
3. What will you monogram on
Shirts, jackets, home décor items, accessories, etc.
4. What font style will look good
Not all fonts look good in all sizes and not all letters look good in all font styles. For example, the script letter “S” in some fonts is hard to read as a monogram, but looks fine when used as a name.
5. What size is the item you will monogram on and where you want it to be placed
These are all very important to consider, so we have a whole section on that and even a reference guide you can download at the end of this article.
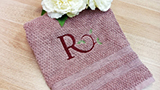
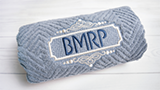
Basic monogramming etiquette states that there ought to be a certain size and order of each letter, depending on each of the factors listed above. Take a look at a few examples of a monogram for a married couple with different surnames. Generally you would have the last name larger where it stands out. These are great to put on a bath towel set for a wedding or Christmas gift.

Elements of a Monogram
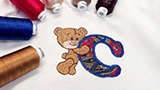
Monograms generally have 3 parts, called elements. You can use one, two, or all three parts. Monogramming in the Hatch Embroidery Customizer, Creator or Digitizer makes it so easy to create your unique monogram.
1. Letters: You can use 1, 2, or 3 letters
2. Ornaments: These are small decorative accents that can surround your monogram. There are 9 different positions in Hatch Embroidery for ornaments but the placements are limited only by your creative imagination!
3. Borders: Borders are placed outside the letters. Sometimes you will combine them with the ornaments and letters but most of the time you’ll just use the border and letters. You can actually place the border in the design up to 4 times using different stitch types or fill the back of your monogram with stitches.
Where Do I Place My Monogram?
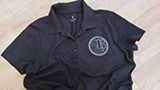
Monograms ought to be placed in certain positions to really enhance the look and functionality of your final design. With different pieces of apparel and items, different positioning is required. Below I have listed some of the most popular items to put monograms on.

Want More Information?
There is so much more to know about monogramming as far as placement and size. So we created a Monogram Placement Guide for you.
Hatch Embroidery software is the fastest-growing embroidery software used in over 100 countries. It is time to join this global trend and give Hatch Embroidery a try! The 30-Day Free Trial gives you unlimited use of all the amazing features, and the 30-Day Money Back Guarantee ensures that there is absolutely no risk involved.

The definite choice when selecting embroidery software
Hatch Embroidery software is a comprehensive embroidery design solution that offers a range of tools and features for both beginners and seasoned embroiderers.
Here’s why it's a great choice:
- User-Friendly Interface: The software is designed with a user-friendly interface that makes it easy for anyone to start creating beautiful embroidery designs, regardless of their experience level.
- Powerful Editing Tools: It provides powerful editing tools that allow users to resize, edit, and adjust embroidery designs with precision. This is essential for businesses that need to customize designs according to specific customer requirements.
- Wide Range of Formats Supported: Hatch Embroidery supports a wide range of machine file formats, making it versatile for use with different embroidery machines. This flexibility is crucial for businesses operating with multiple machine types.
- Professional Quality: The software generates professional-quality stitches, ensuring that the end products are of high quality, which is vital for maintaining customer satisfaction and business reputation.
- Extensive Design Features: With features like auto-digitizing, lettering, monogramming, and even special effects, businesses can offer a wide range of embroidery services, increasing their market appeal and potential revenue streams.
- Regular Updates and Support: Hatch provides regular software updates and robust customer support, ensuring that businesses can always access the latest features and get help when needed.
Overall, Hatch Embroidery software equips you with the tools necessary to create stunning, high-quality embroidery designs efficiently and effectively, enhancing productivity and customer satisfaction.
Related Articles
Fun DIY Projects for You to Try with Hatch Embroidery!
3 minute read
Frame and Display Your Machine Embroidery Designs!
4 minute read
Categories
- Popular Posts
- Recent Posts